Have you ever tried to paint your nails or make a pretty nail art design but things just wouldn’t go as planned? Today I’ll show you lots of simple but mind-blowing nail hacks that will change your life.
1. Nail art studs with puffy paint

Occasionally I like decorating my nails with studs. However, if you don’t have any nail art studs you can use puffy paint instead. Sounds crazy but it works.
Steps-:
- First, apply a coat of black nail polish on all of my nails.
- Grab some puffy paints. These ones come in a convenient pen-shaped bottle, so they are really easy to use. Squeeze dots of puffy paint directly on the nail.
Neon colors are looking good against the black background. I kept the rest three nails simple with one puffy paint stud on each. I really love how weird and creative this idea is.
2. Matte nails with decoupage glue
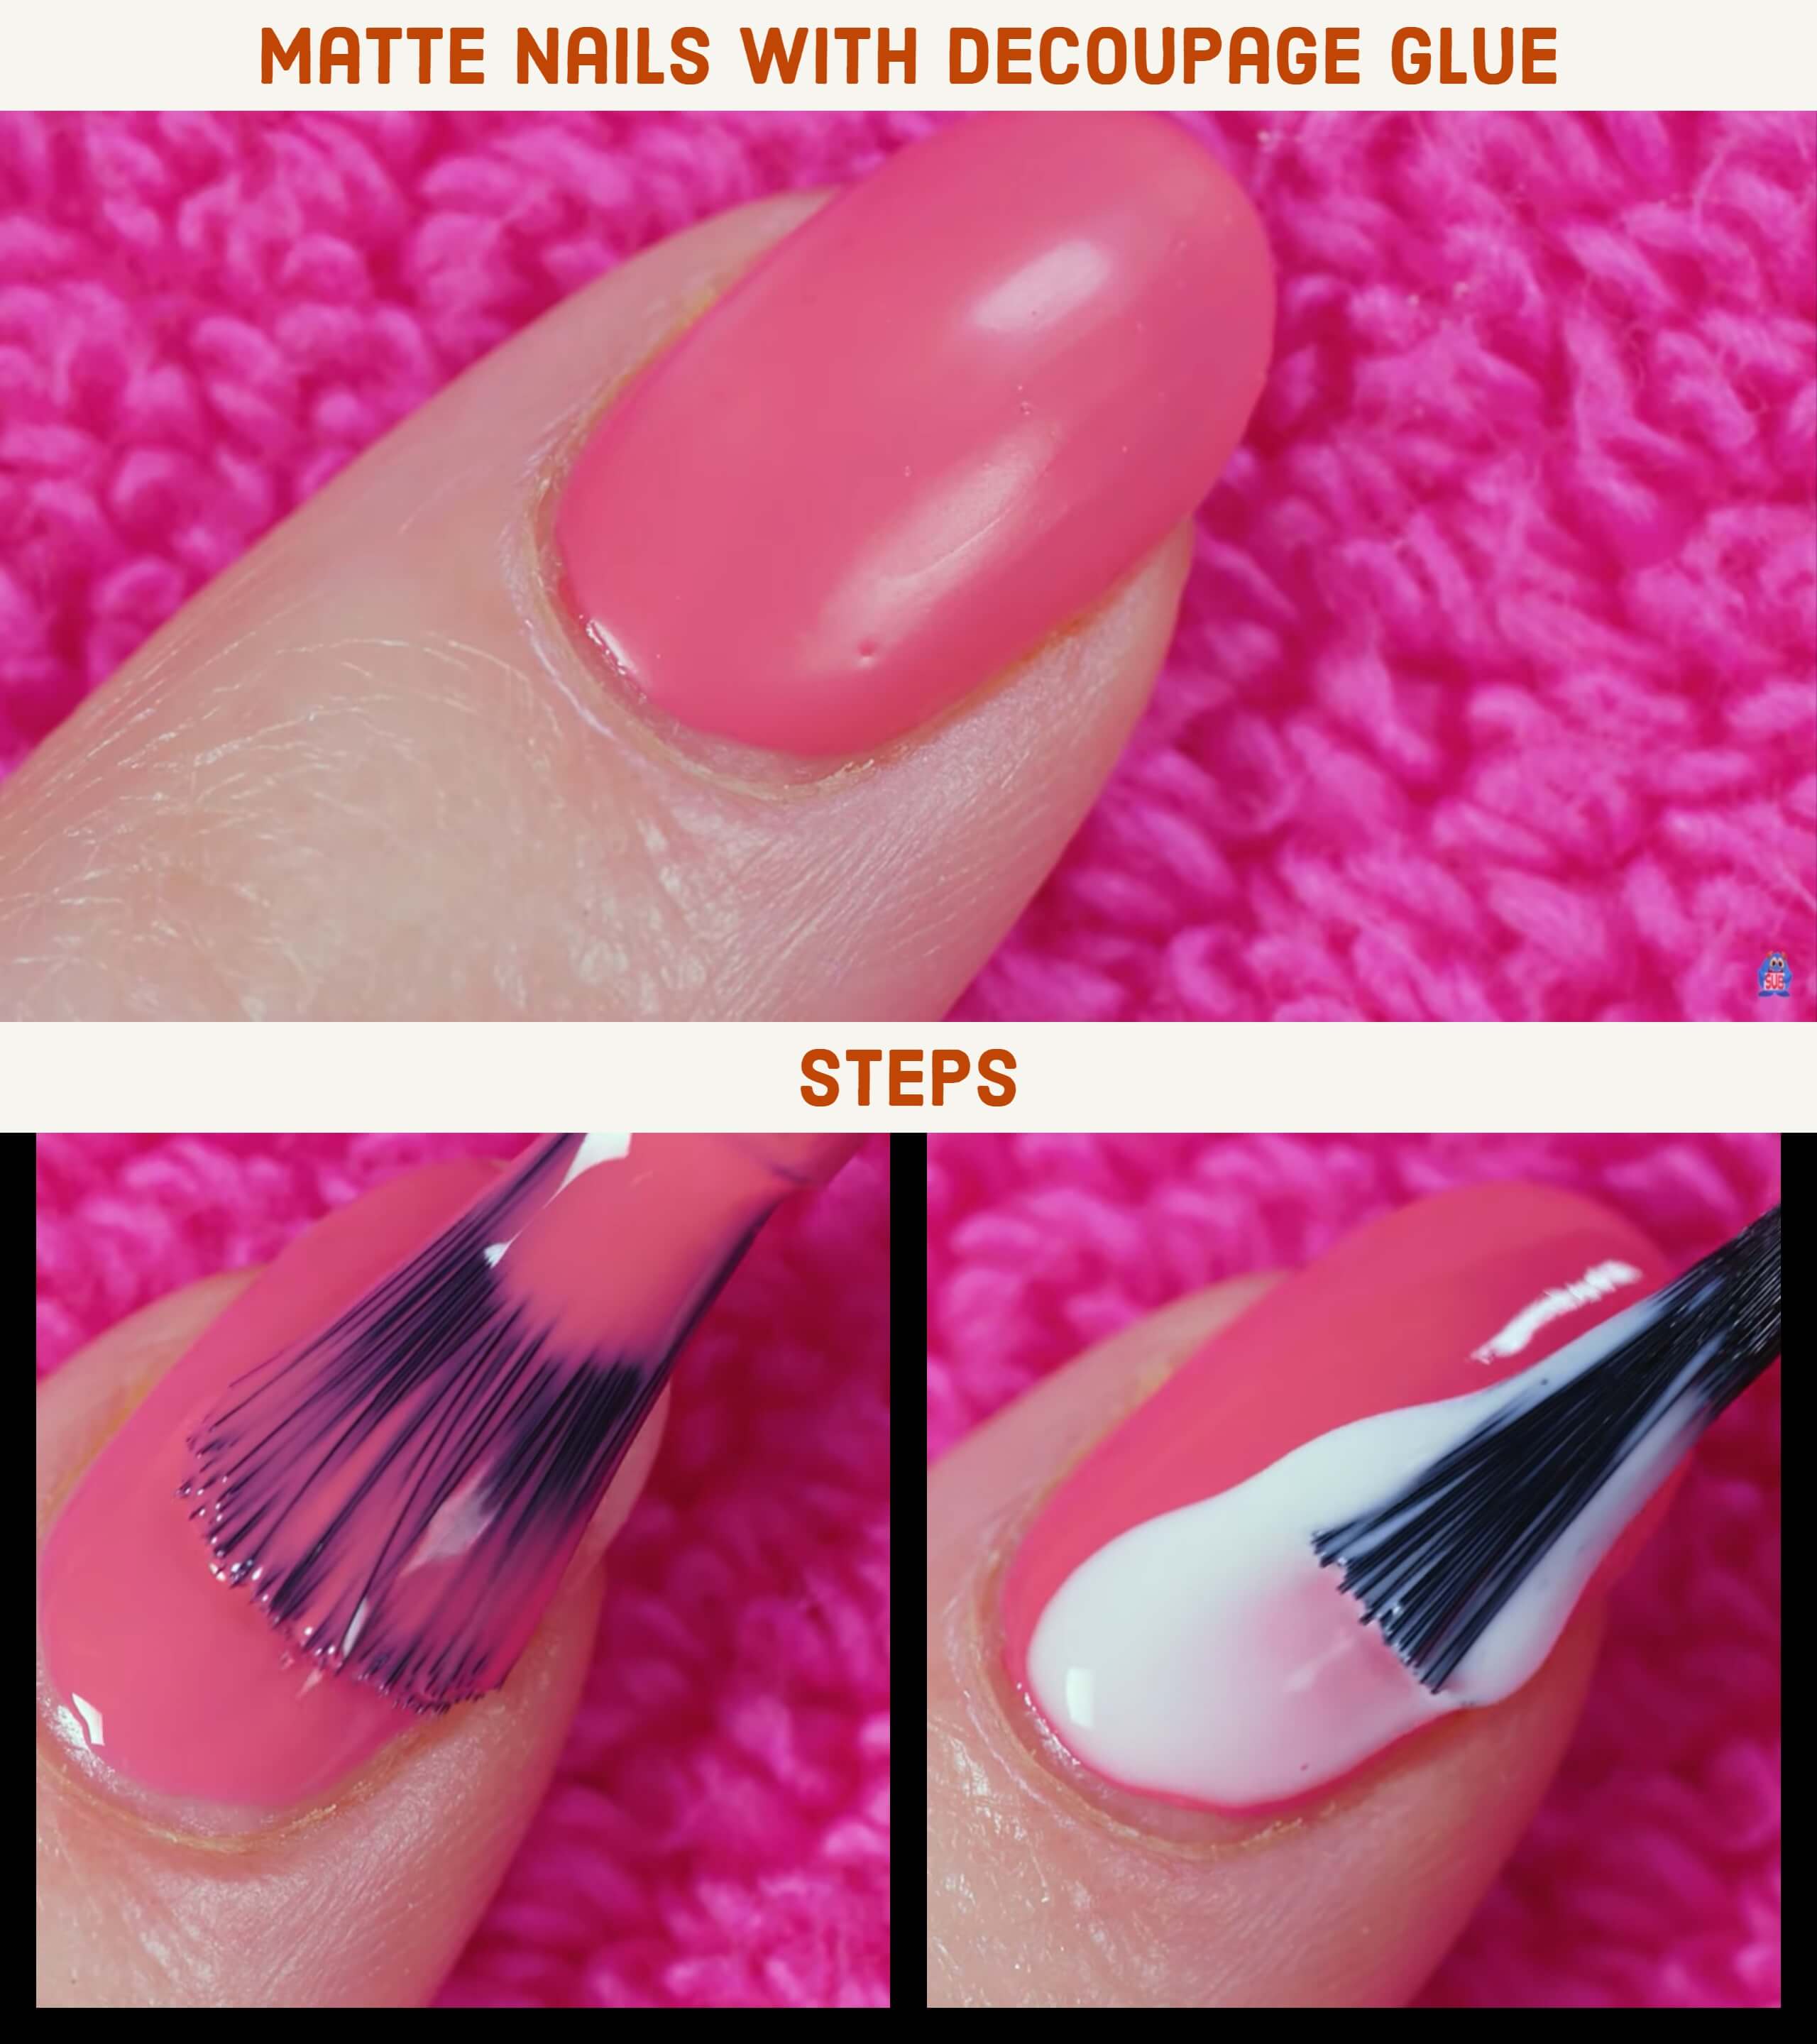
There’s something so elegant and special about matte nails. But what to do if you don’t have a matte topcoat? No problem, you can use a matte decoupage glue.
Steps-:
- Apply your nail polish as you normally do.
- Now dip an old nail polish brush in mod podge with a matte finish. Apply that all over your nails.
- Give it a few minutes so the decoupage glue dries.
I know it looks crazy and you may think that you’ve just ruined your manicure. But don’t stress. It will become completely transparent plus it will give your nails the perfect matte finish that you’ve been looking for.
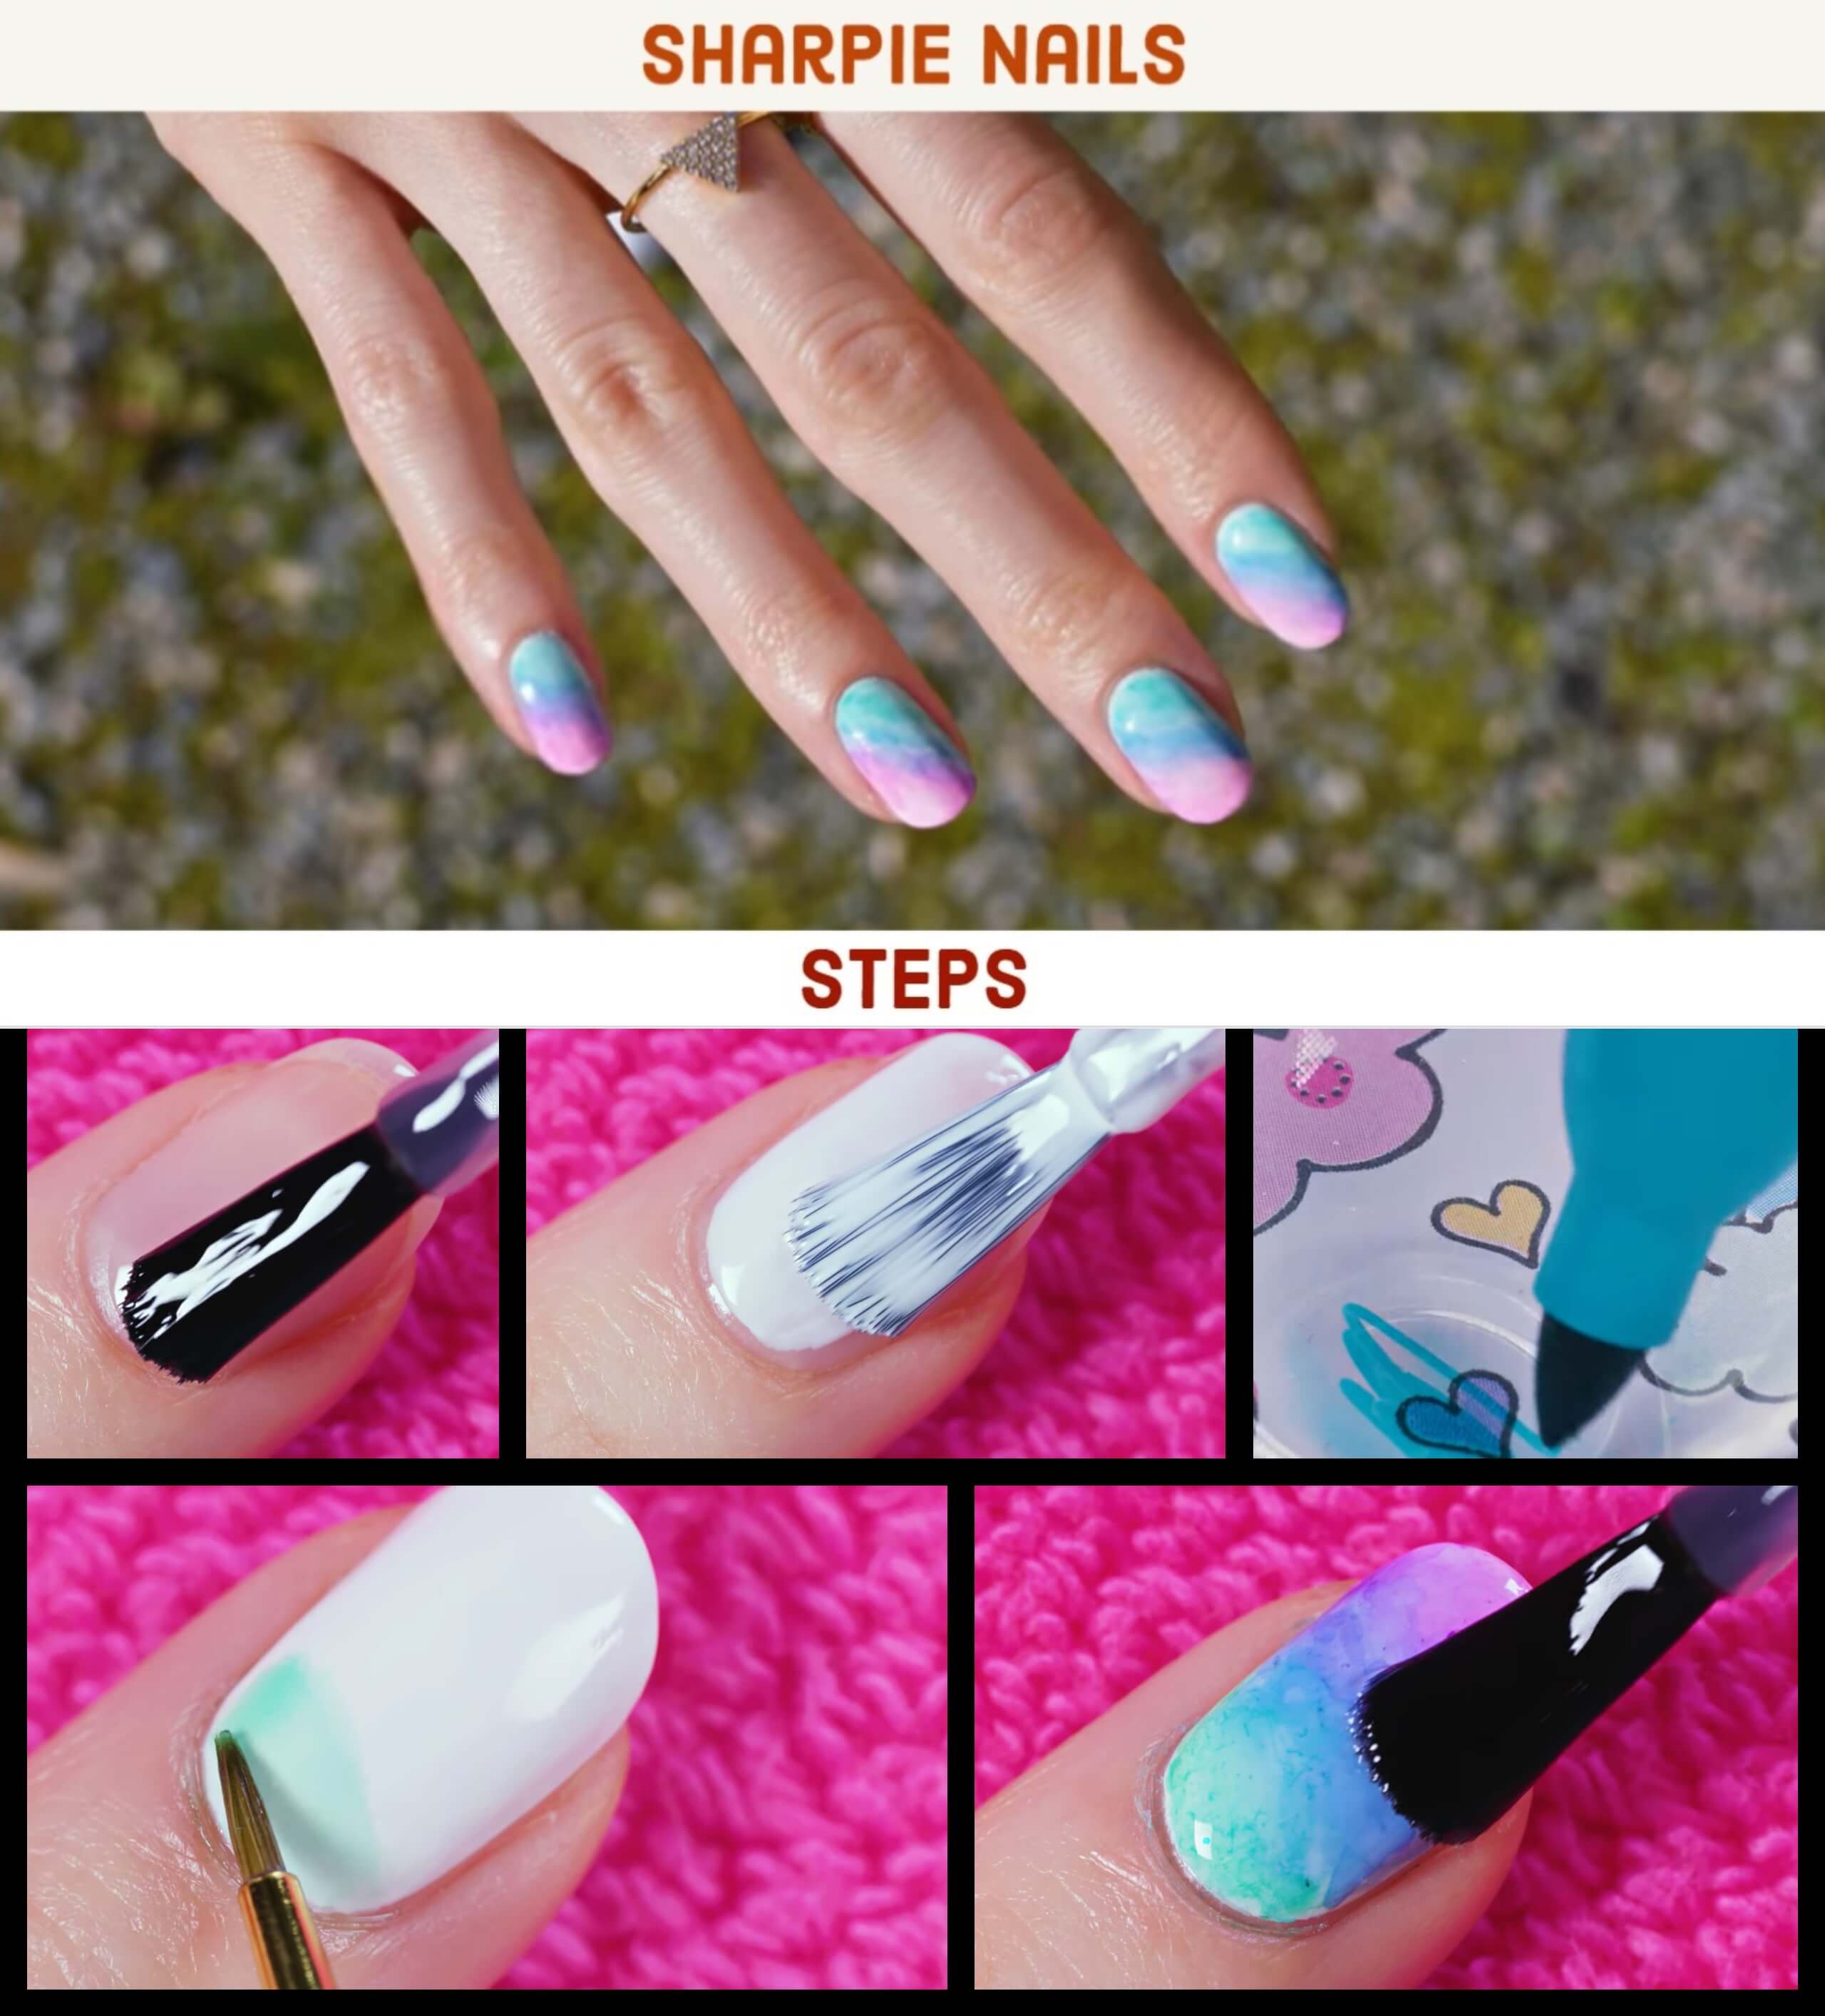
3. Sharpie nails
Whenever you’re painting your nails, start by applying a base coat. This will protect your nails from harsh chemicals, prolong the wear of the nail polish and overall keep your nails looking pretty and healthy.
Steps-:
- Now let’s apply white polish to create a perfect blank canvas for our design.
- Take any sharpie or other permanent markers of your choice and color the bottom of the glass container.
- Drip in one or two drops of rubbing alcohol.
- Next, take a small paintbrush, dip it into the alcohol and we’re ready to paint.
- Using a gentle dabbing motion apply the color on the nails.
- Time to get in with the second color and this time I went for this beautiful marine blue. This one will go diagonally across the middle of the nail.
- My last color is bright fuchsia pink. Dilute the marker with a drop of rubbing alcohol, dip the brush in and let’s color the last third of the nail.
- When you’re happy with how your design looks, apply a layer of topcoat to protect it and give your nails a pretty shine.
Remember that you can make this design as bright as you like. If you want more color, just build it up.
If you want a soft and gentle look on the nails, keep the colors more pastel by applying only one layer.
What I love the most with this nail art hack is that it simply can’t go wrong. It is an abstract design after all so you can apply the colors however you like and it will always look beautiful.
4. Glittery sharpie nails
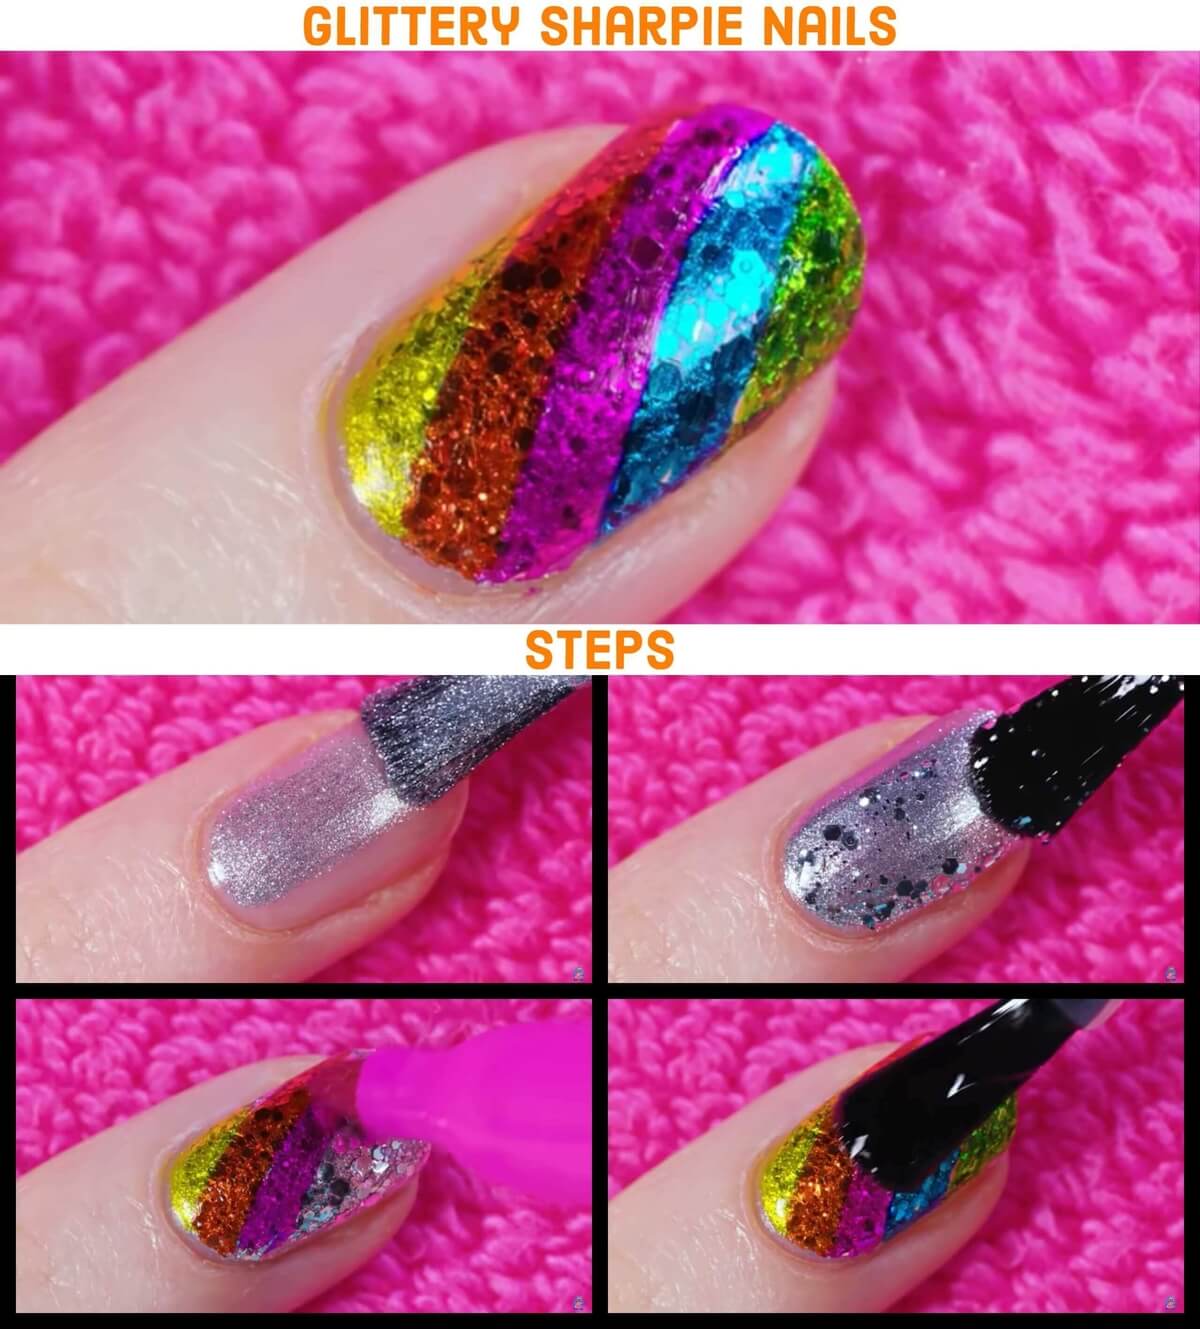
I saw this on Pinterest a while ago and I thought I need to try it out.
Steps-:
- First, we have to make our nails super glittery. I decided to go for silver.
- Apply a layer or two of metallic silver nail polish.
- This glitter polish contains a variety of silver glitter in different sizes. From super tiny to chunkier silver pieces. Apply a few layers with a brush or a sponge until your nail is completely covered in glitter and looks like a giant sparkly diamond.
- Take a sharpie, I decided to make a diagonal stripe, but feel free to make any design you like. Take another color, for me, it’s orange and add another stripe. Keep doing this until the entire nail is covered. I also used pink, blue and green colors.
- To finish up this gorgeous creation, apply a layer of fast-drying topcoat.
I love how you can see the glitter chunks through the colored filters made with sharpies. Such a genius idea. It looks like the 90’s retro disco-inspired vibe.
5. Water marbling nails
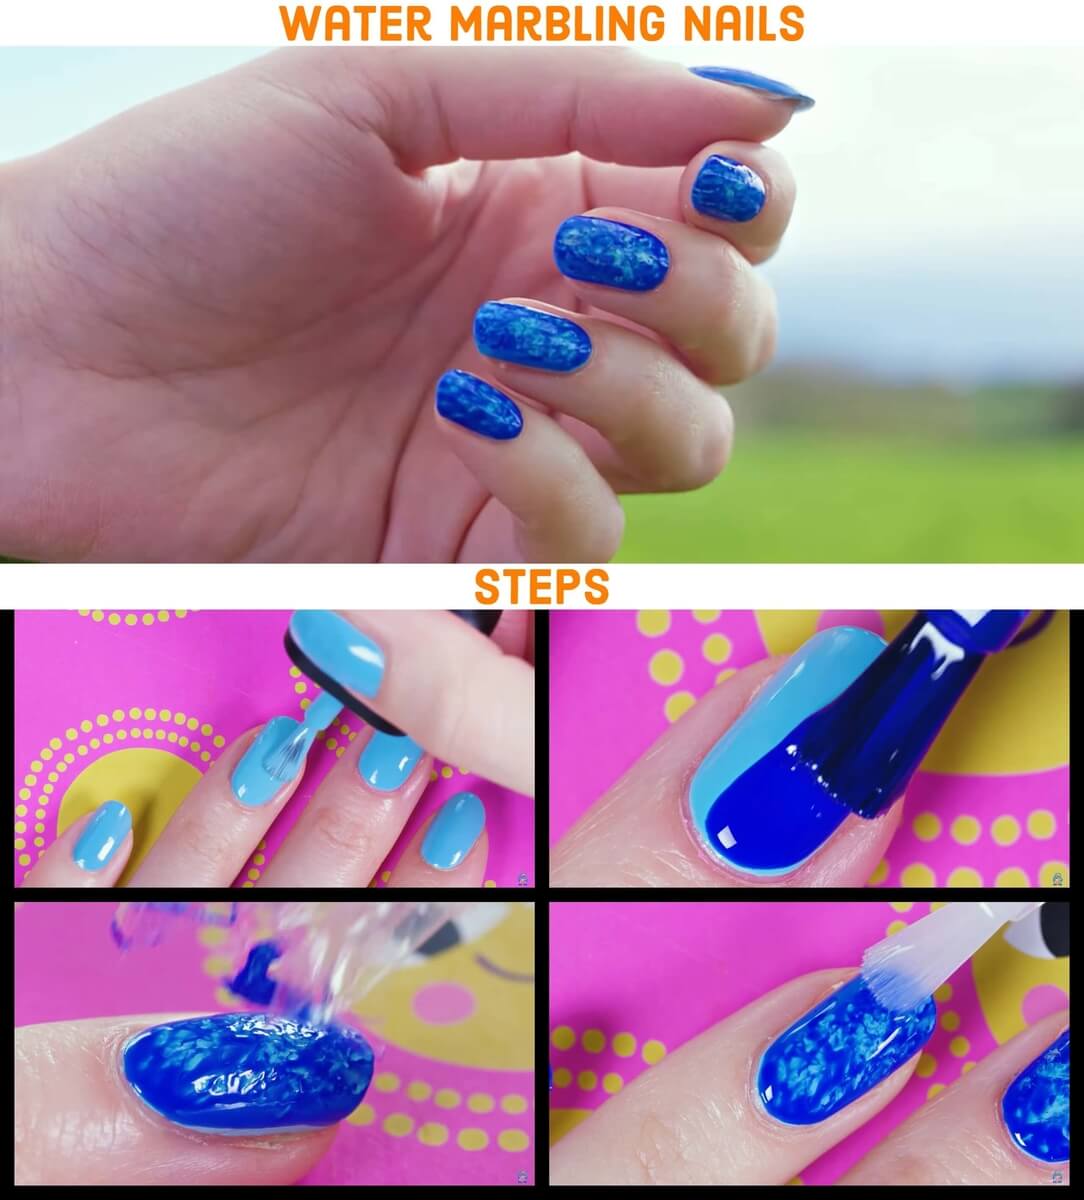
In this, there’s a lot of things that can go wrong with it so instead, I’ll show you an easy alternative that turns out great every single time.
Steps-:
- I started with light blue nail polish as a base.
- On top, I applied a layer of darker blue nail polish.
- Take a piece of cellophane and scrunch it up in a ball. While the dark blue polish is still wet do a gentle tapping motion all over the nail. And as a result, you will get a beautiful marble effect.
- Don’t forget to apply a topcoat for some extra shine and protection.
Since I used light and dark blue colors the end result looks like the surface of a swimming pool or ocean. So pretty and perfect for summer.
Water marbling is so tricky and time-consuming. Many times the polish won’t spread on the water surface and you just end up wasting a lot of product. If you are great in water marbling props to you, but I am definitely not. So for girls like me, this alternative to water marbling is just priceless.
6. Eyeliners on your nails
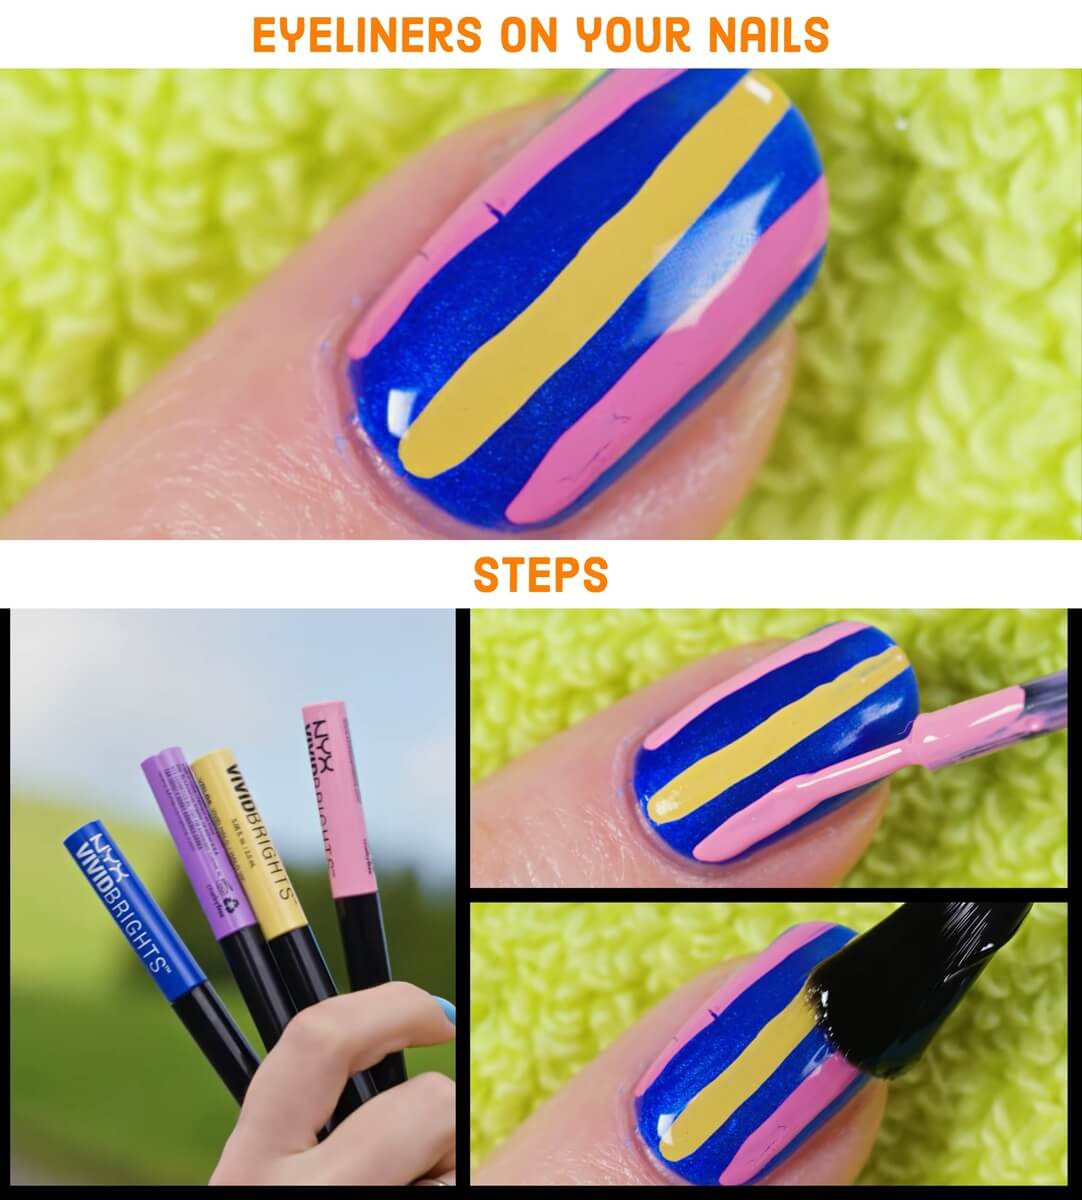
Have you ever thought of using makeup products on your nails? I certainly did and they work wonders. Here I have a bunch of colored liquid eyeliners. They can totally work as nail art stripers.
Steps-:
- I’m picking a yellow eyeliner and let’s make a vertical stripe along the center of the nail.
- I’ll add two light pink stripes on each side of the nail.
- Usually, it is so hard for light colors like yellow or pink, for example, to look opaque on top of darker colors like blue. But these are 100% opaque with just one swipe.
- The important step is to seal everything in place with a generous amount of fast-drying topcoat. This will lock the colors in place and the manicure will last you many days.
7. Liquid lipstick on nails
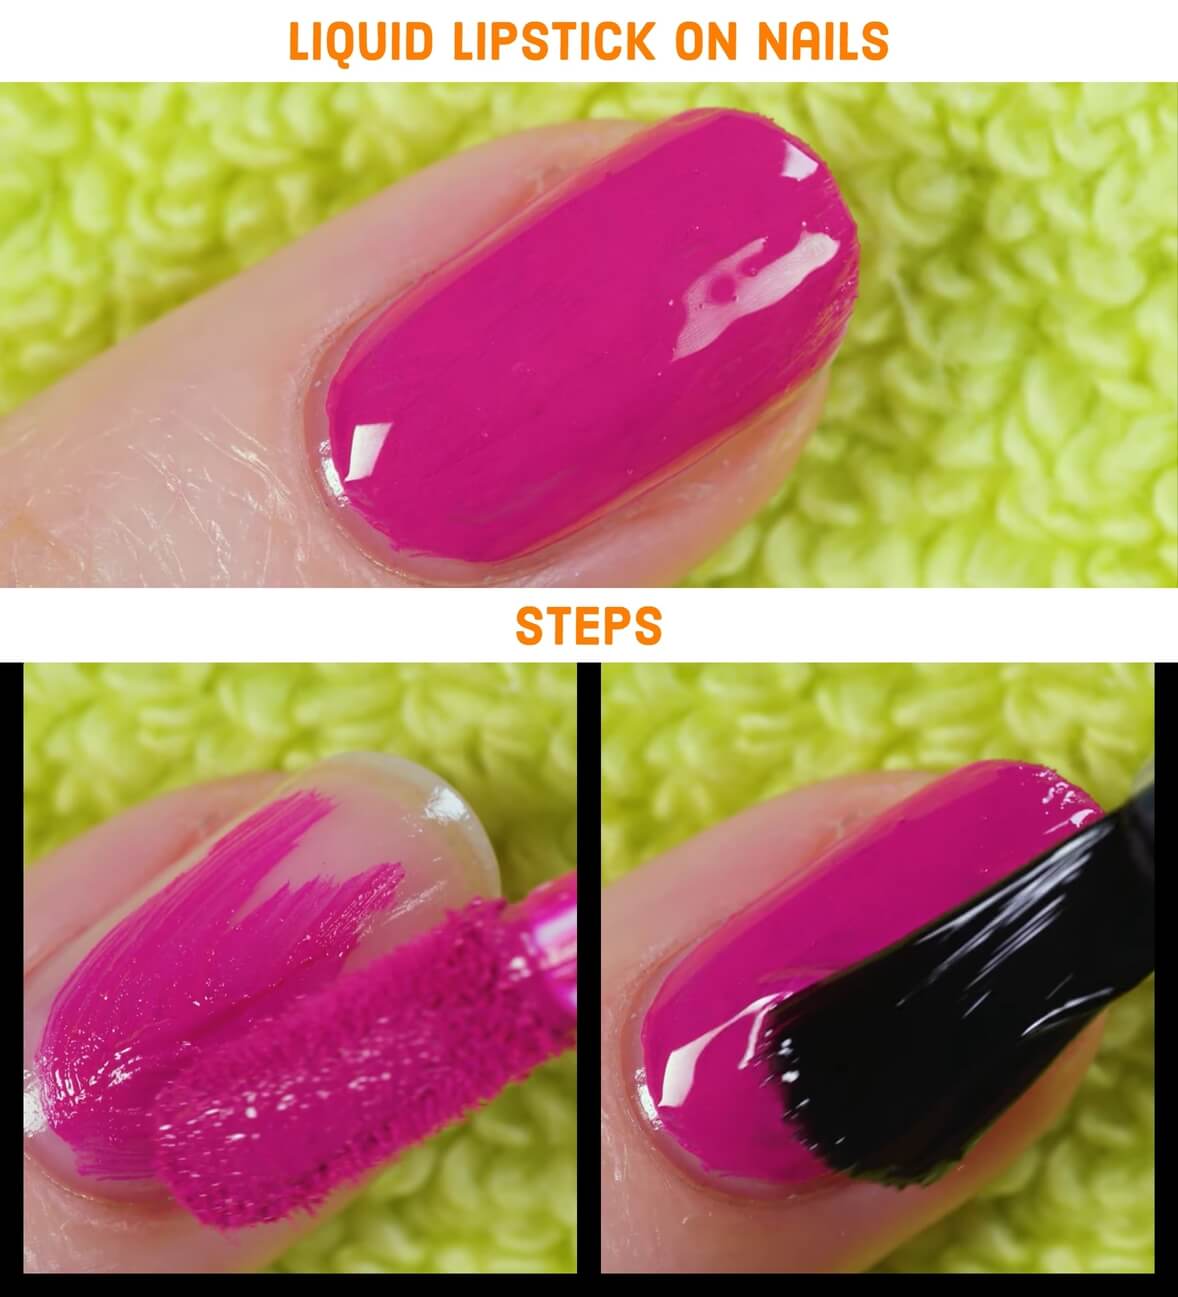
Another makeup product that works wonders on the nails is liquid lipstick. This is a great trick for when you want to match the color of your lips to your nails. It’s so difficult to find the exact same shade of lipstick and nail polish so this hack is a perfect solution.
Steps-:
- Apply a layer of liquid lipstick to your nail.
- To finish up, use a topcoat and lock the color in place. This step is absolutely crucial and will make sure your manicure lasts for days.
I love this hack because it gives me so many more options to chose from when I’m deciding with what color should I paint my nails. This liquid lipstick is super convenient.
8. Pencil eyeliners and lip liners on the nails
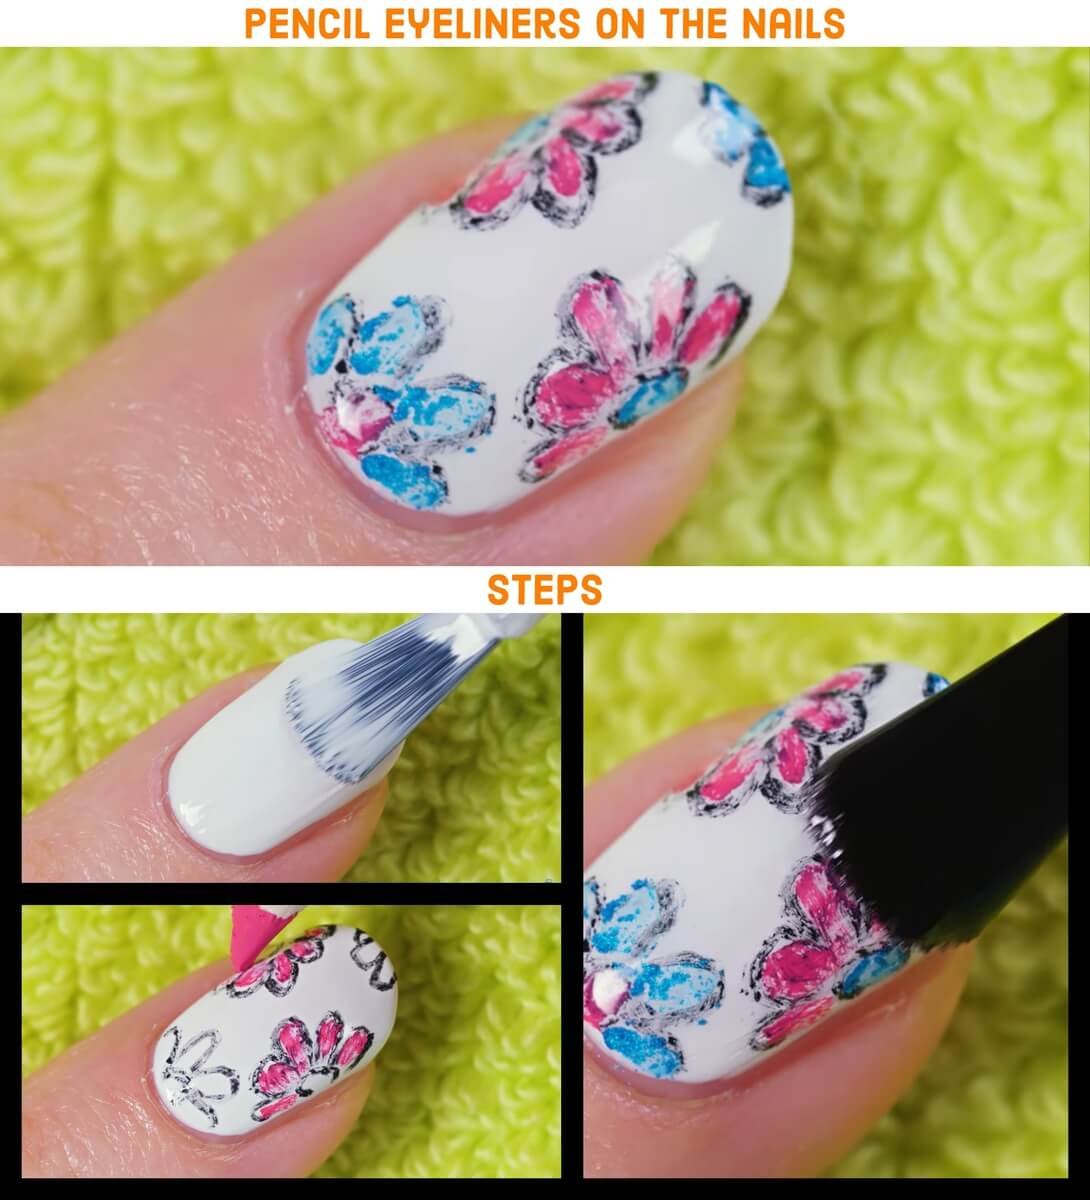
You must think I’m completely crazy, but wait until you see this.
Steps-:
- Apply one or two layers of white nail polish on top of the base coat, and we are ready to draw.
- Here I have a black pencil eyeliner but we’re not going to use it on the eyes today. I’ll use it to outline flowers on my nails instead. Can you believe how easy and effortless this is? I honestly love how imperfect this looks – just like those doodles and sketches you draw on paper. The outline is finished, now we need to color our flowers up.
- We’re going to use a red pencil lip liner. To make the design even more fun I’ll color the other two flowers with blue pencil eyeliner. This will make the design even more colorful and bright.
- Let’s apply a layer of topcoat to protect our creation and add a beautiful shine to the nails.
And to think of how many different designs you can make using pencil eyeliners and lip liners. What an incredible life hack.
I am seriously obsessed with the retro look of this one plus I love how unconventional and crazy it is.
9. Eye shadow on the nails
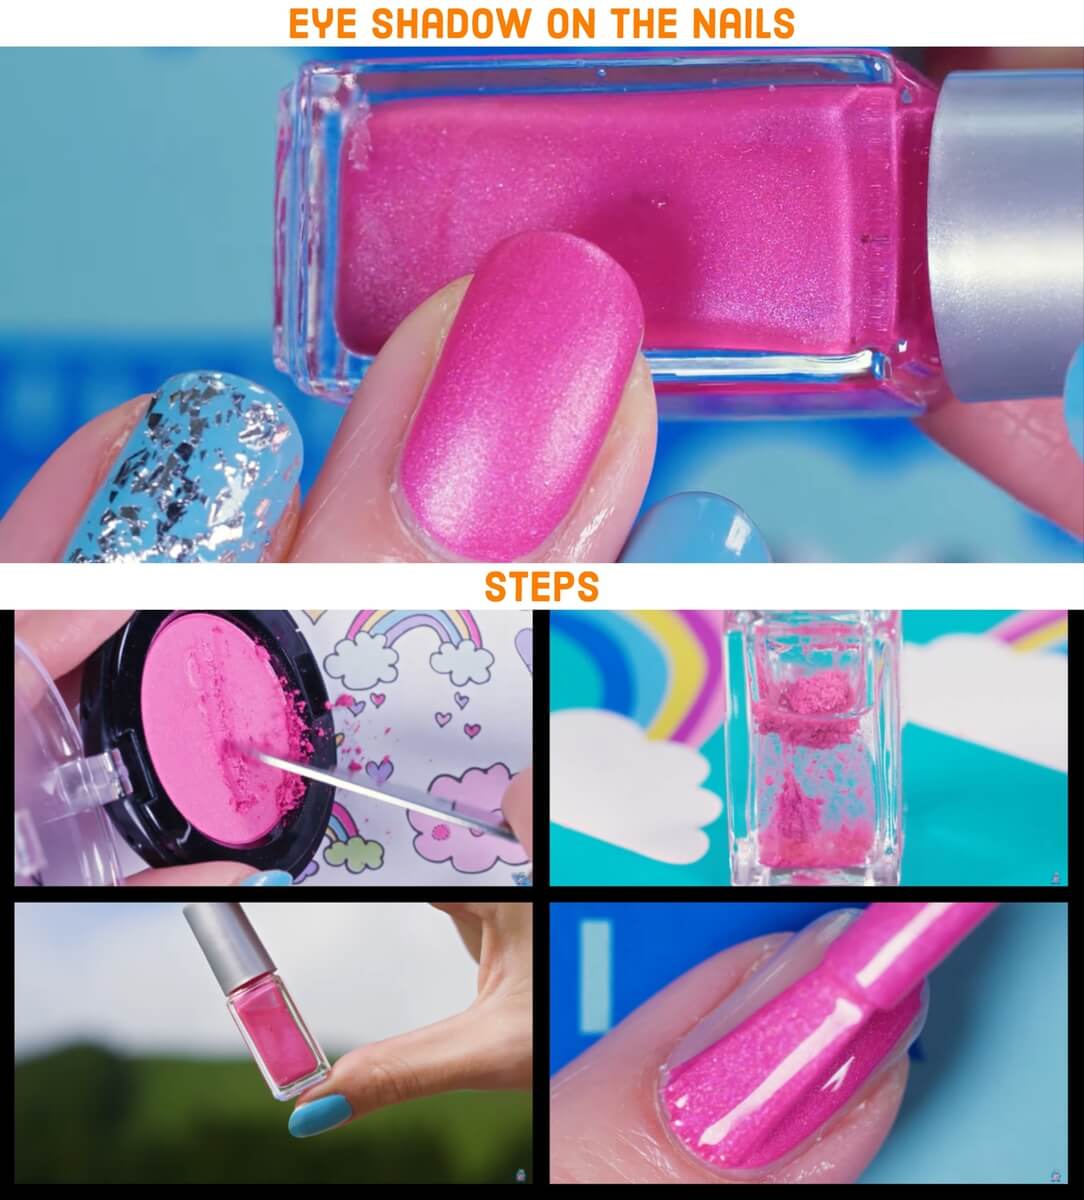
This eye shadow surely looks great on the eyes, but you know where it looks even better? On the nails!
Steps-:
- Scrape some eye shadow on a piece of paper like this. Alternatively, you can use lose eye shadow pigment.
- Place a paper funnel in the opening of transparent nail polish.
- Pour the eyeshadow or loose pigment in the bottle.
- Let’s give our new nail polish a little shake.
In the same way, you can make literally any nail polish color you like. You can even mix a few different shades or add some shimmer. My eyeshadow already was a bit shimmery so I got a lovely metallic pink nail polish. I also noticed that the polish dries up matte which is so cool.
10. Markers on nails
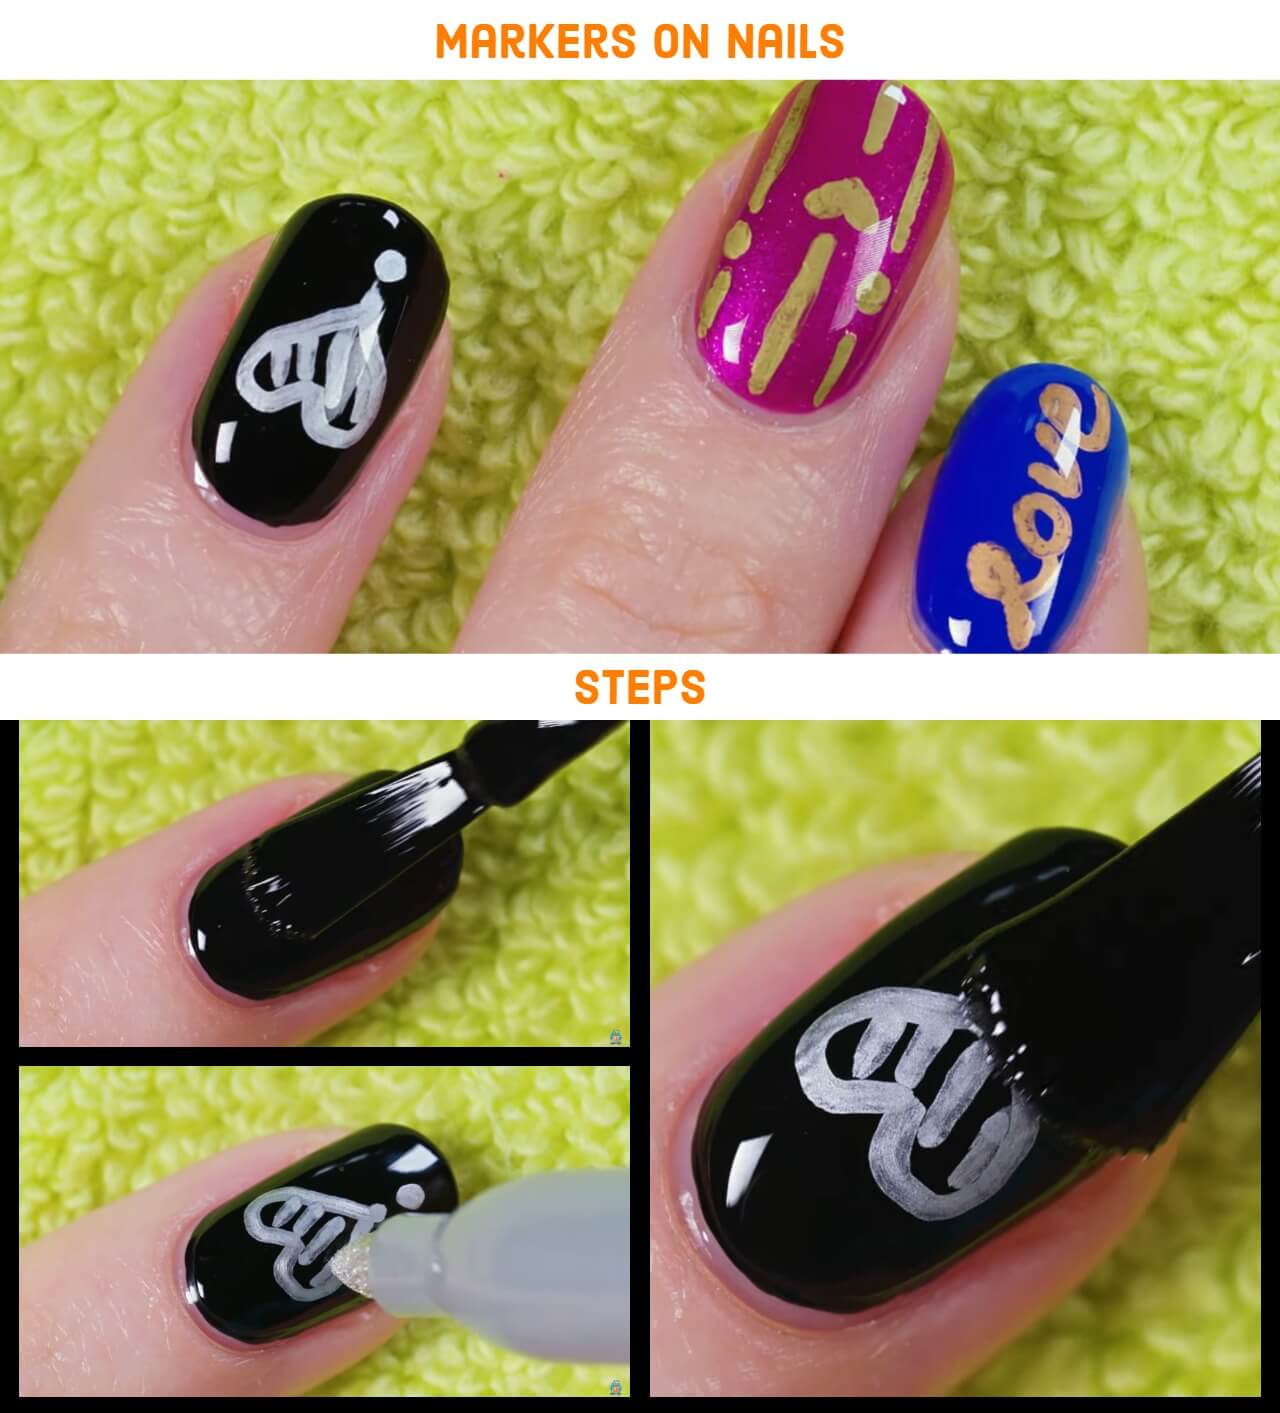
They are such a perfect tool for your nail art kit.
Steps-:
- I am starting with a black base.
- Now let’s pick a silver metallic sharpie. I decided to draw on a heart exclamation mark. And to make the design a bit more full, let’s draw some diagonal stripes inside the heart.
- Alright, let’s finish it up with a layer of topcoat and we’re good to go.
11. Color pencils on nails
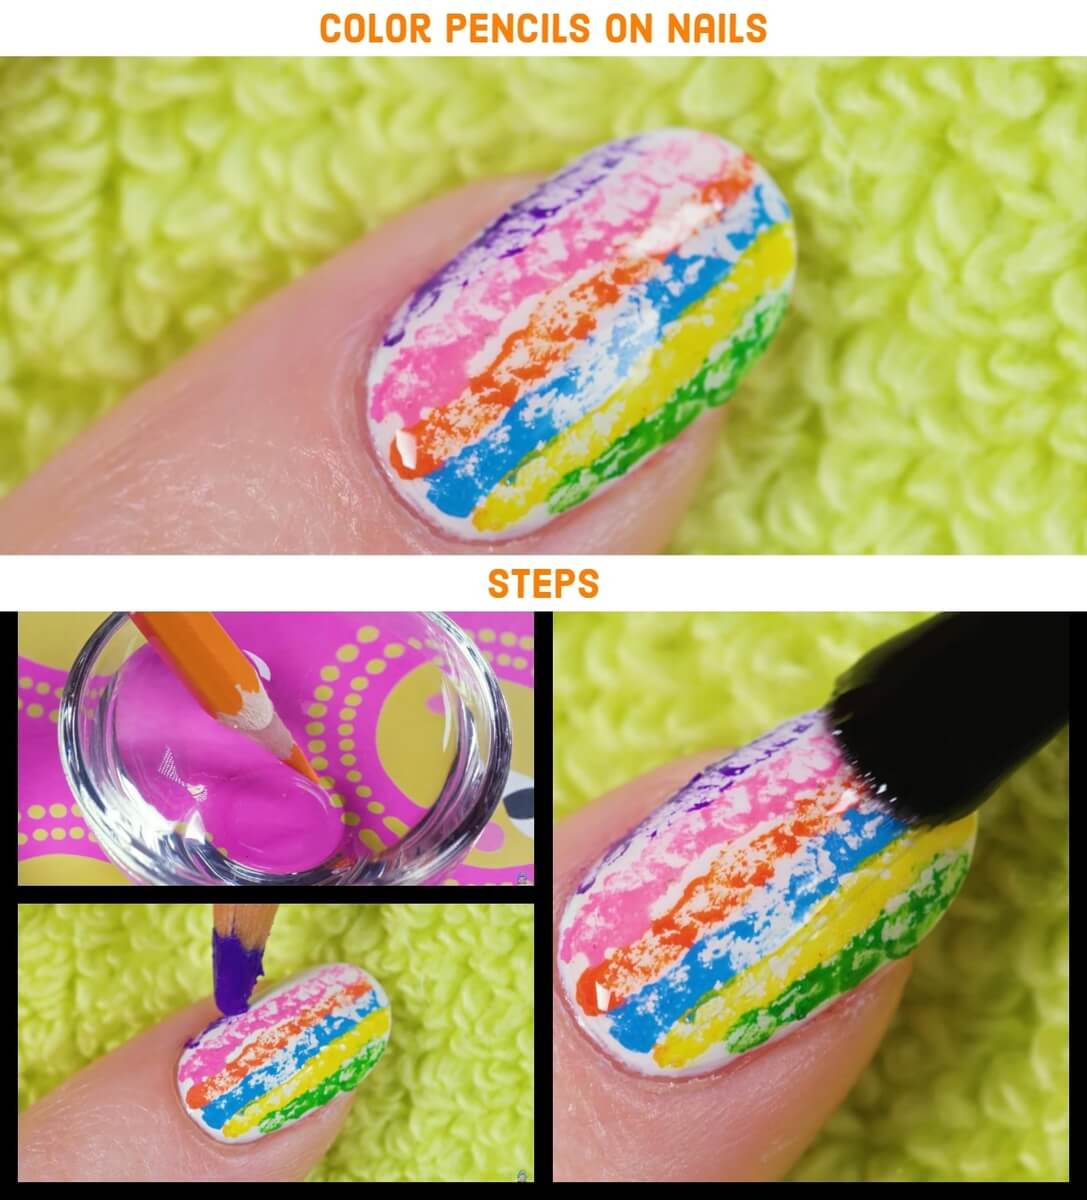
Drawing with coloring pencils is so easy. How fun it would be if we could use them to draw directly on our nails.
Steps-:
- Take a coloring pencil of your choice and dip the tip in some warm water. This will basically melt the color a bit, making it possible to draw on the nail. My first color was orange, next one is blue.
- Let’s make a stripe close to the orange one. I want to keep things simple so I’m going for an easy vertical stripes design.
- You want to do a gentle dabbing motion while moving along the nail. Since you have to be tapping the pencil in order to deposit the color, I suggest to only go for easy geometric designs using this technique. Complicated drawings would be kind of difficult to make. So go for a simple design and you will do great for sure.
- Now, we have to apply a layer of topcoat to seal the design and make sure that it lasts us super long.
As you can see coloring pencil are not great only for drawing on paper, they work great on nails as well.
12. Washi tape nails
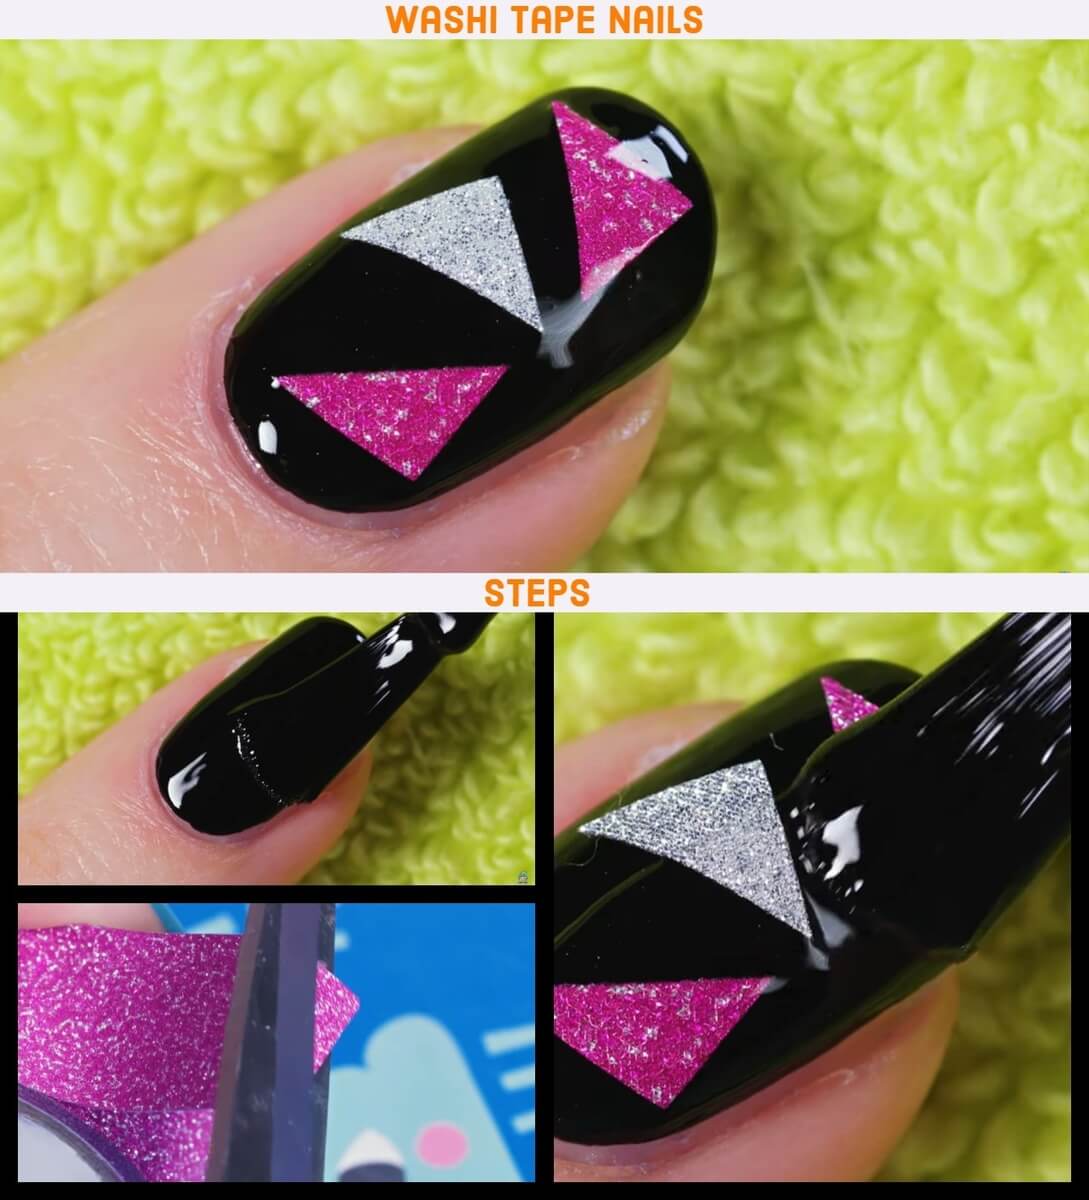
In this post, I showed that craft supplies can easily become nail art supplies if you think outside the box. Washi or glittery tape like is no exception.
Steps-:
- Let’s apply a layer of nail polish as a base. I went for black but you can pick any color you like.
- Now chose a craft tape of your choice.
- Take your scissors and cut a little triangle piece.
- With the help of tweezers place a glittery triangle on the nail. Continue making more triangles like this in different colors. You can, of course, make your triangles as small or as big as you like or you can even switch up the shapes.
- Lastly, you need to apply a layer of fast-drying top coat to lock the tape pieces in place and bring the design together.