Window repairs can be costly, especially if you are getting a professional to do the installation for you. It is much better to utilize self-help sites and books to get repairs and installations done on your own. However, if you do plan on getting a professional, look for a company like Apex Window Werks that offers a vast amount of services and has received numerous excellent testimonials over the years.
Follow this DIY step-by-step guide to remove your old window and install a new one
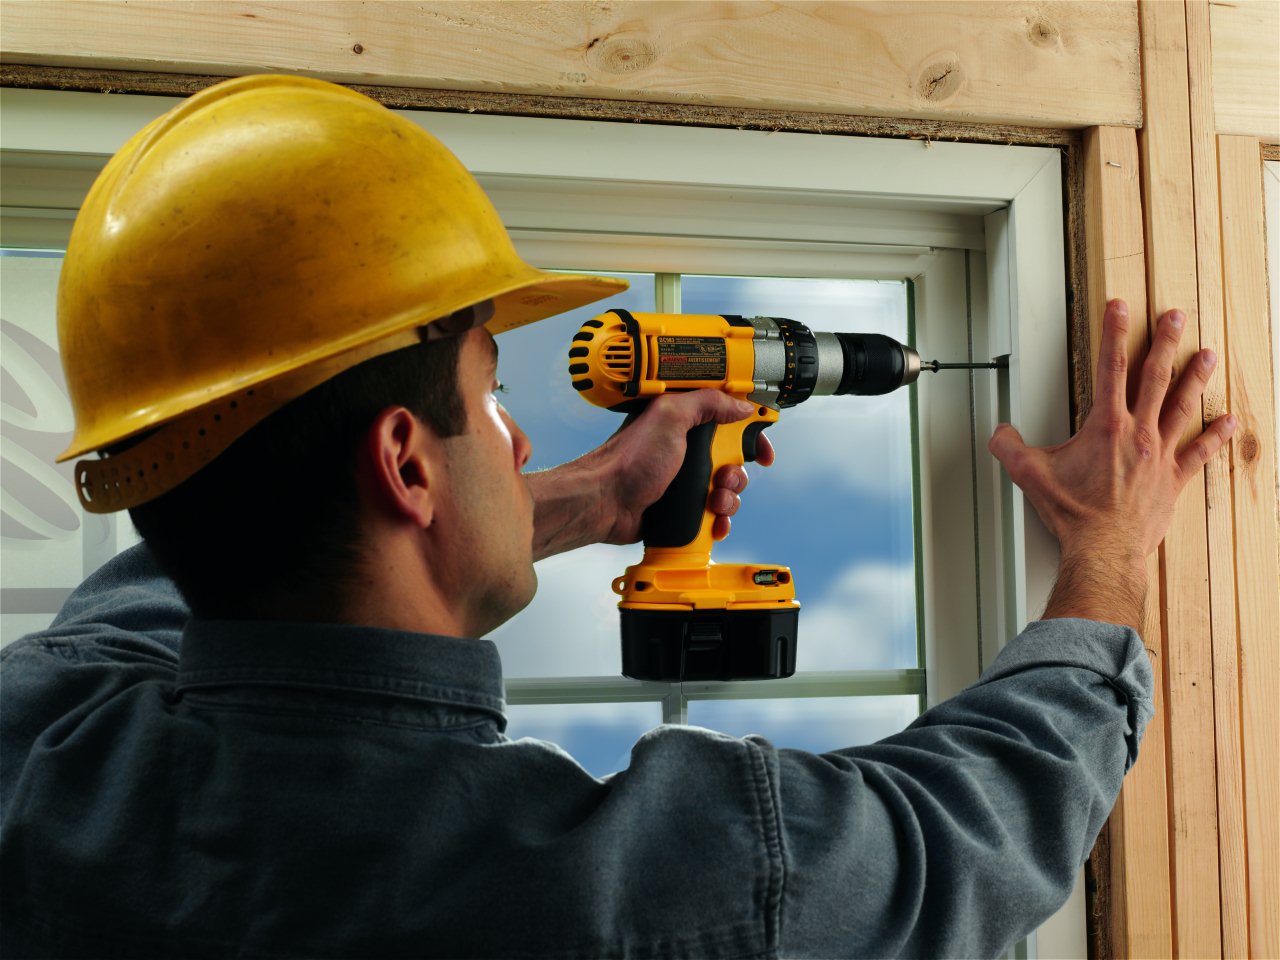
STEP 1: Take Out Window Trim and Casing
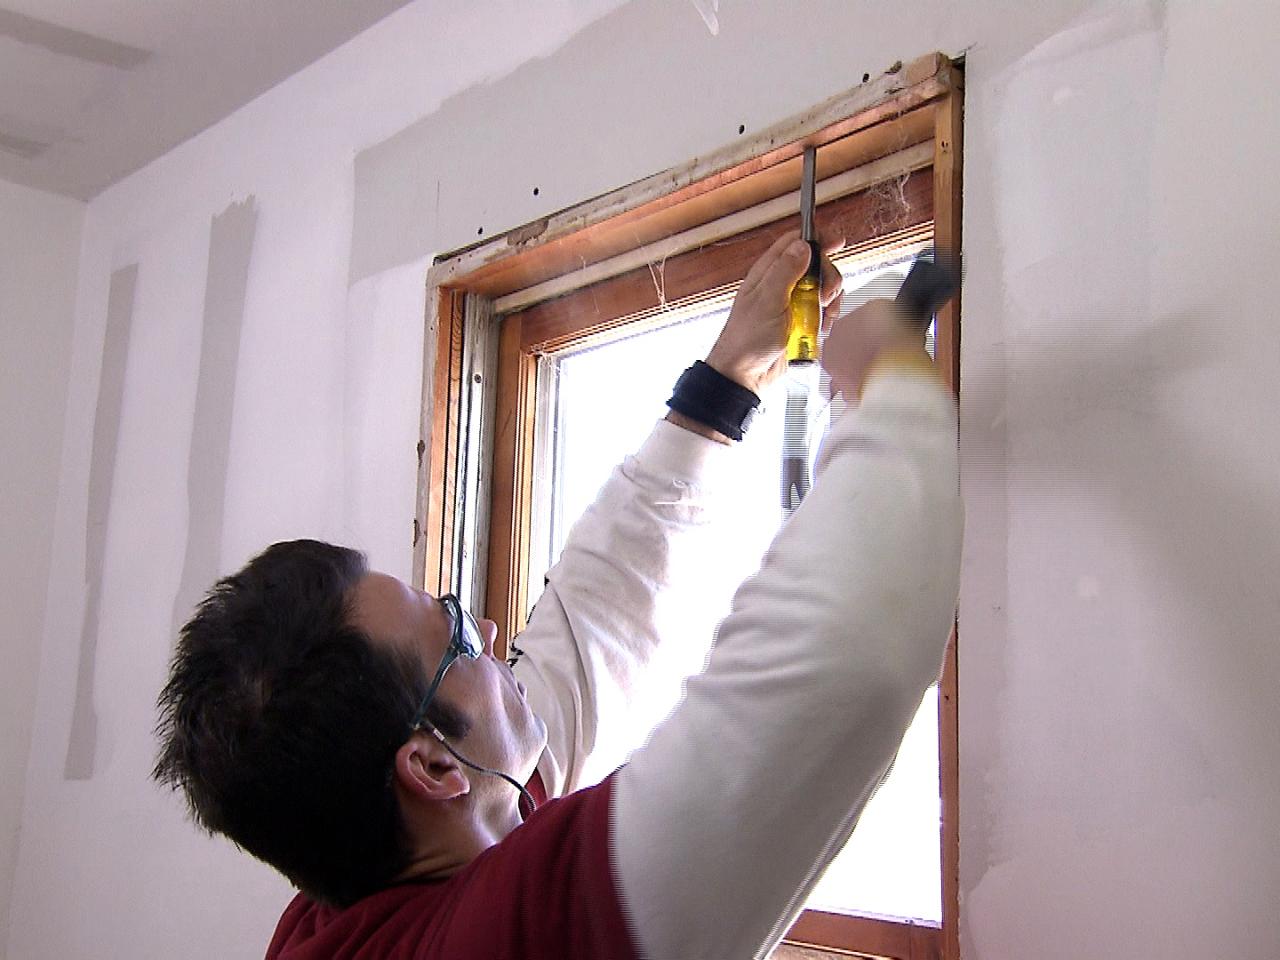
The first thing to do is to work with a prybar to remove the windowpane trim and frame extension from around the older window. The jam extension is just a piece of wood that’s been ripped down and attached to the window jamb to bring it even with the wall.
STEP 2: Remove Old Window/Guide Track
Loosen the window from the jamb and take it out. Make sure not to break the glass while removing it. Lots of windows will have multiple window sashes with moving tracks on the side. These types of windows might be much easier to remove one sash at a time.
STEP 3: Prep/Repair New Window Opening
With the window off the wall, inspect the condition of the window jamb to ensure there is no damage. It’s not uncommon for an old window to leak, rotting out the jamb. If there is harm, you will need to replace or fix the damaged parts of the jamb before continuing. Also, you will need to determine your rough opening to make sure that it can support your new window. The rough opening should be 1/4″ to 3/8″ bigger than the exterior dimensions of the new window.
STEP 4: Inspect/Replace Window Stop
The window stop is a piece of wood ripped down and placed around the exterior side of the window jamb. The function of the stop is to avoid the window from slipping out of the opening. It literally stops the window from moving. It’s very likely that the first stop is still able to be used, however, if it is damaged, you may need to fix or change this as well.
STEP 5: Dry Fit Window
Right before applying the silicone to the window stop, dry fit the window to make sure there are no fitment issues. If you do get fitment issues, address them now and then dry fit the window again. When done correctly the window should fit snugly into the opening. Do not progress forward with the install till you are okay with the way the window fits in the opening.
STEP 6: Set up Window
The install of the window is very simple. First, run a drop of silicone on the inside edge of the window stop and after that slide the window into place. Place a level over the tip of the window and press wood shims between the lowest part of the window frame and the jamb as necessary to get the window sitting level. The window will usually come with its own hardware packet, usually consisting of four screws that will undergo the sides of the unit to anchor it to the jamb. 2 screws should be put into each side of the window, one near the top and the other near the bottom. There will be pre-drilled holes in the window frame for the screws.
STEP 7: Add Insulation
There may be spaces around the previous window frame the wall studs, and this is the perfect chance to insulate those areas a lot better. For larger gaps, cut pieces of roll insulation and pack them into the gaps. For harder to reach spots, you can use expanding spray insulation foam.
STEP 8: Add Extension Jambs and Trim Molding
Choose a style of molding that suits your home’s style and create a frame around the window. Measure the size of each piece and use a miter saw to cut the trim to the appropriate length. Make your cuts on 45-degree corners so the trim will fit together with a nice picture-frame look. Attach the trim to the wall with finish nails. You can even need to add thin strips of woodwork (a jamb extension, see Step 1) inside the original window frame to cover the space in between the new window and the drywall.
Pro Tip
At first, use enough nails to hold the trim to the wall up until you’ve successfully aligned all four sides of the frame. When you’ve achieved the proper fit and you ensure the trim will not need extra adjustments to fit in, you can go back and add more nails, every 6 to 8 ins. Any slight gaps in the corners could be filled out with silicone before painting.
STEP 9: Paint and Add Finishing Touches
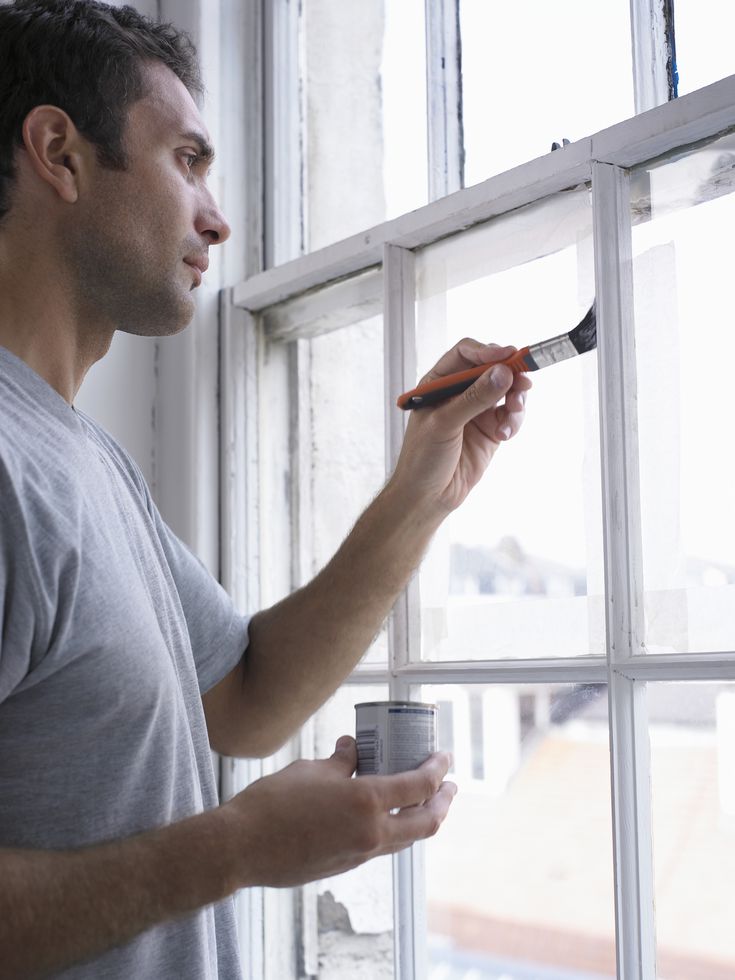
The last step is to complete off the window framing by filling any nail holes with stainable/paintable wood cement and painting or staining the trim molding around the window for a completed look.
Following these simple steps will ensure that you achieve the desired results however, if you do not feel confident enough then getting a professional is highly recommended.