No worries if your room looks plain and boring. In this post, I’ll show you 8 beautiful Christmas-inspired decorating ideas, which will make your room look amazeballs.
1. Pine tree pillowcase
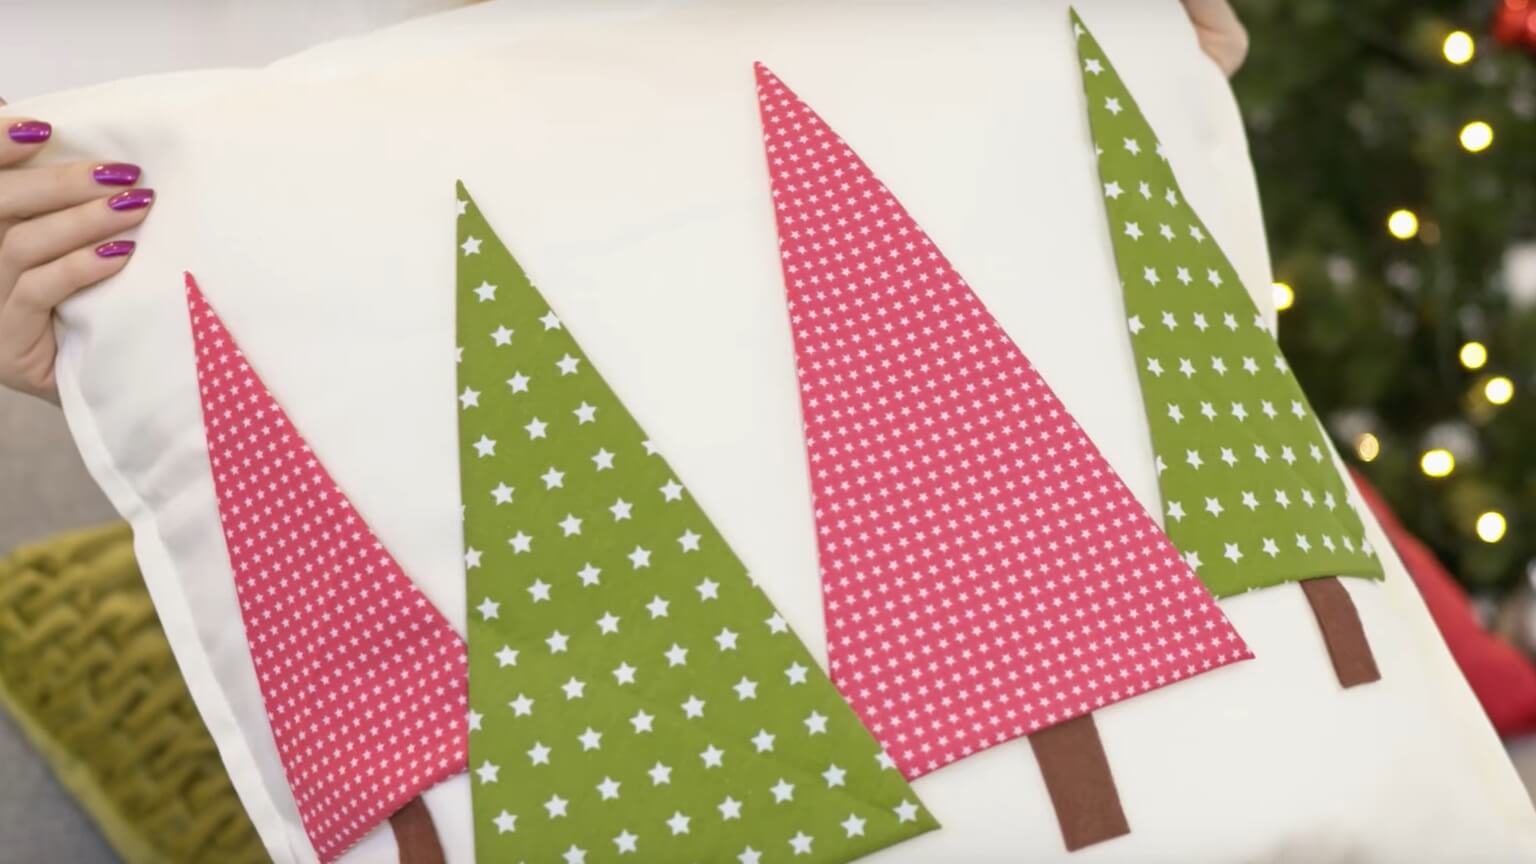
Pine tree pillowcase, which is a great decoration for all year around plus you can make it for very cheap. I love using patterned fabric pieces because they just make the pillow more interesting and full.
Requirements-:
- Plain pillowcase
- Patterned fabric
- A piece of brown fabric
- Fabric glue
How to make-:
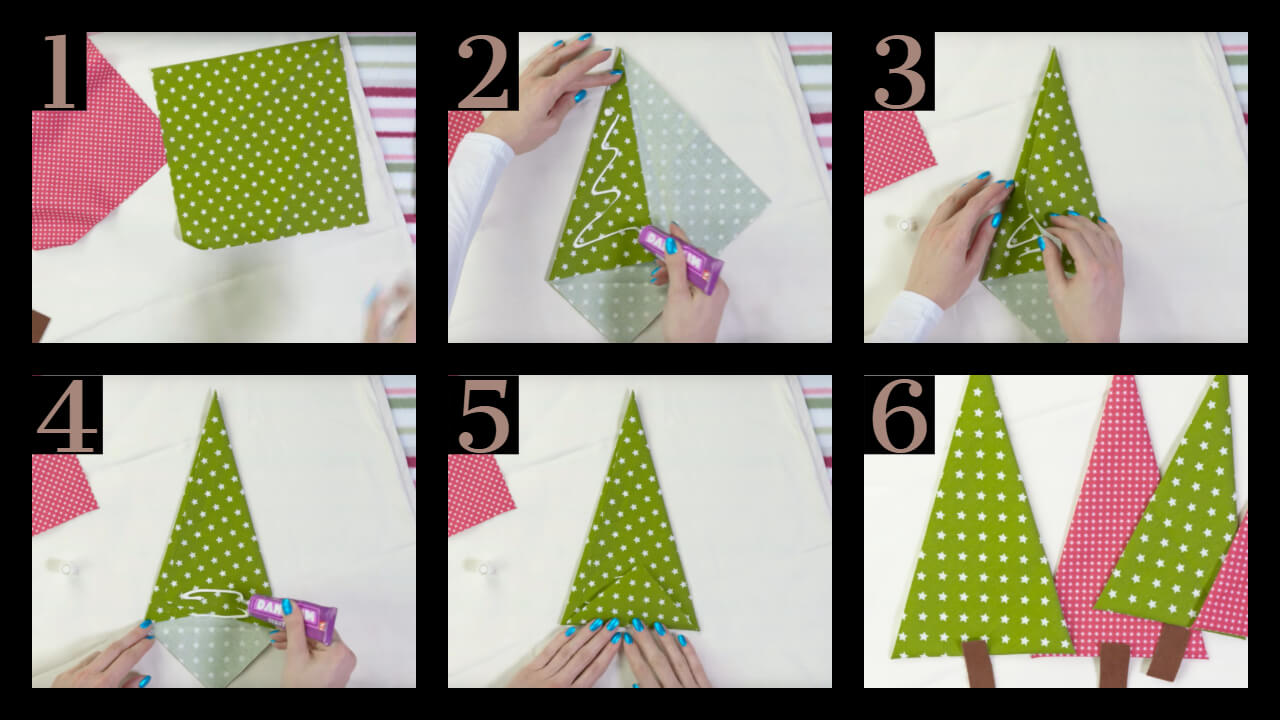
- Fold one side corner as shown in the image.
- Apply some glue and fold the opposite corner over it.
- Apply the glue also on the bottom part of your tree and fold that little triangle up.
- You get a beautiful pine tree shape, with perfectly neat edges completely without sewing.
- Of course, every tree also has a trunk, so lets cut four rectangles from a brown piece of felt or any other fabric of your choice.
We are now all ready to glue our pine trees on the pillow. Apply a bit of glue on the back of each pine beauty and place it onto the pillowcase. I like that my trees overlap a bit so it looks more realistic. In the end, we have to glue the four trunks under each of our beautiful pine trees.
We are finished with this gorgeous pine tree pillow, which looks great in your bedroom or living room.
2. Sweater candles
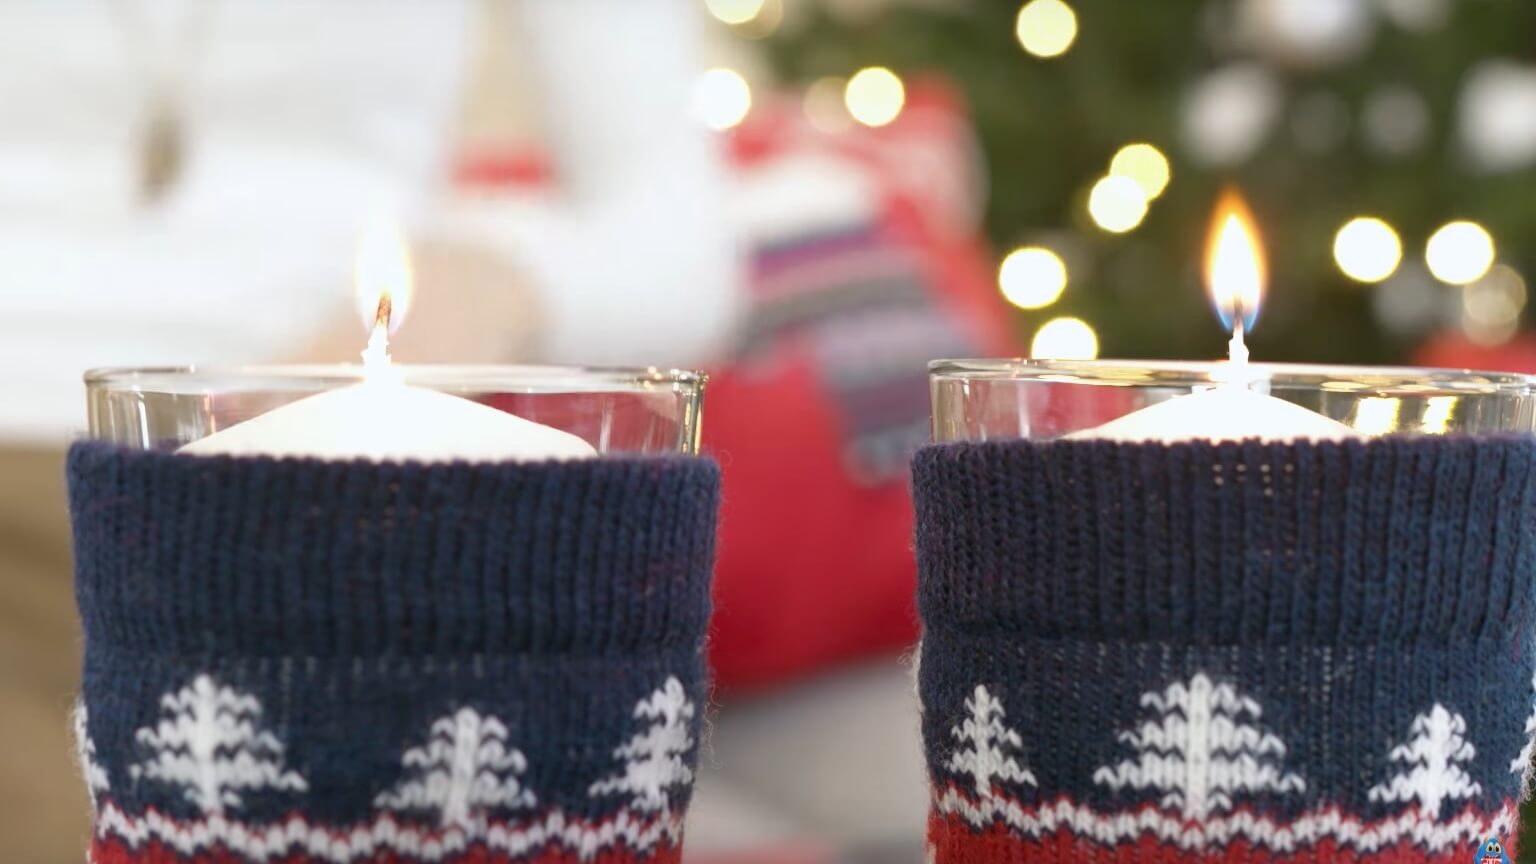
A very easy and super adorable winter decor ideas are these sweater candles. These literally take a minute to make and they look so beautiful, warm and cozy. This kind of DIYs is my favorite – quick, easy and stunning!
Requirements-:
- Candle
- Glass
- Sock
How to make-:
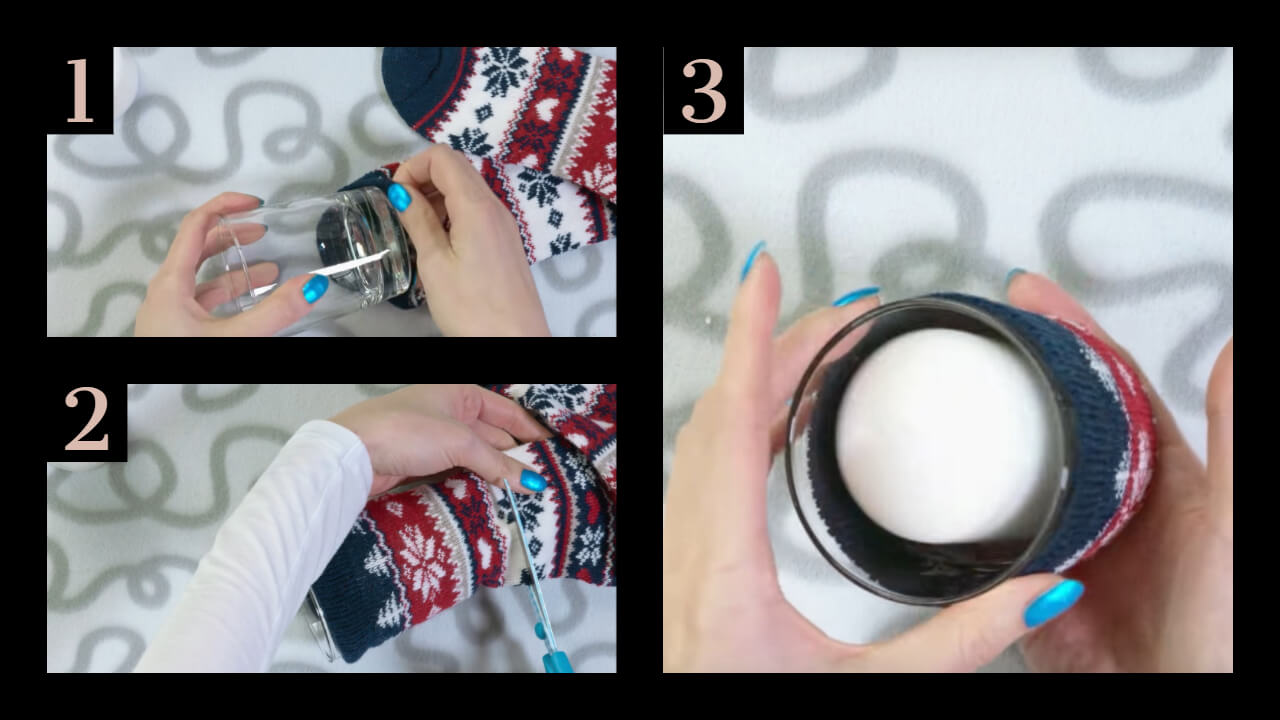
- Put the glass into the sock opening and cut away the excess. I like to leave some extra fabric, which I then tuck under the glass.
- Put the candle into the glass and you have the cutest winter candles ever.
3. Pine tree bouquet
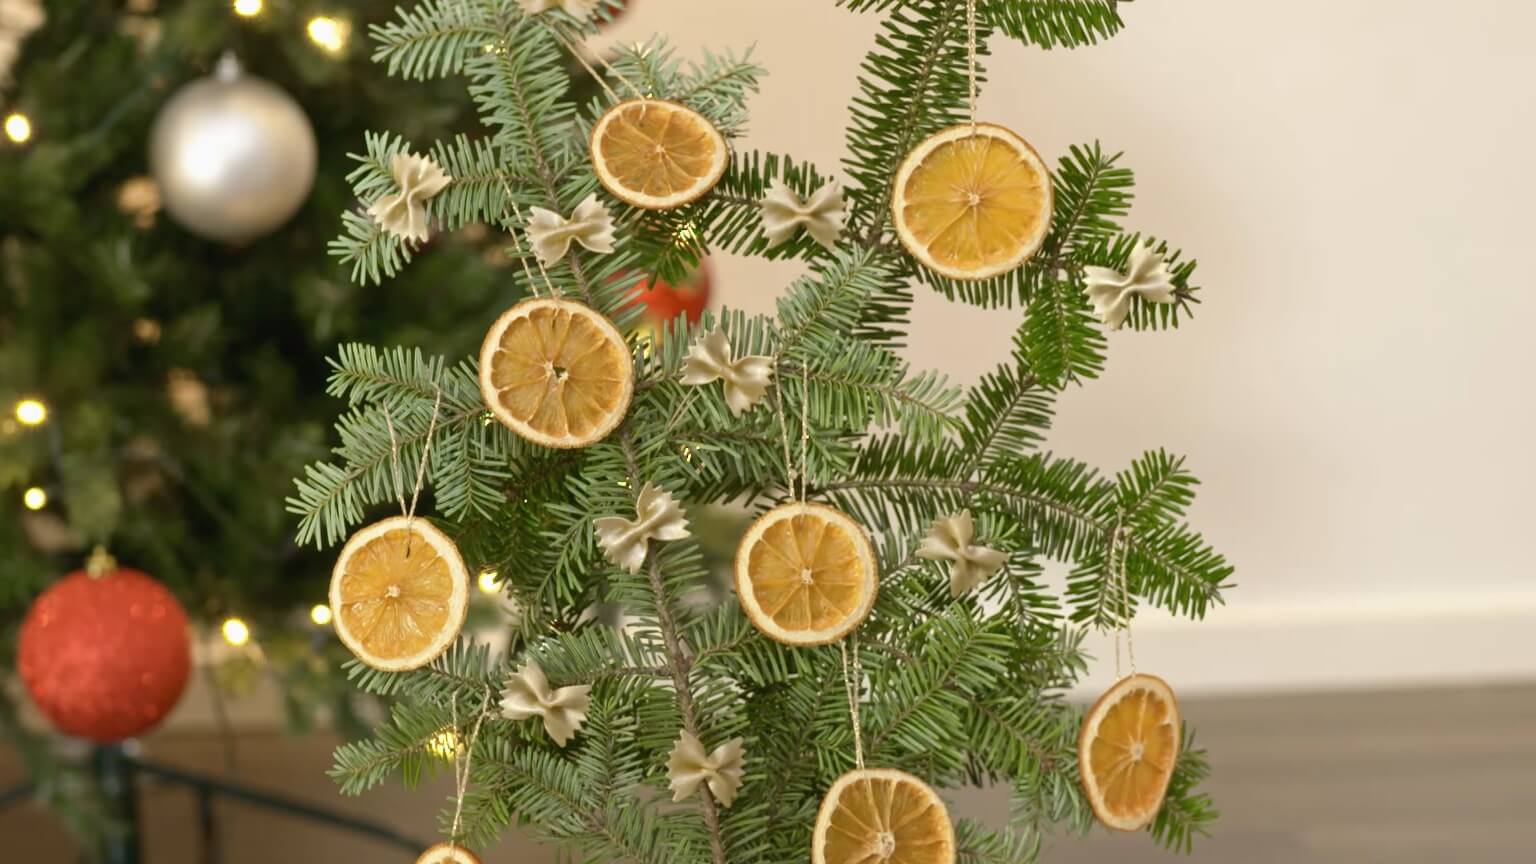
A really cool and inexpensive decoration for the wintertime. This pine tree bouquet with orange and pasta ornaments. Using orange and pasta to create such a gorgeous decoration may seem crazy but I think we all agree that the result is stunning. I just love making unique and inexpensive crafts like this one. On top of that oranges smell so nice you won’t need to burn any scented candles at all.
Requirements-:
- Find a pine tree or any other tree really and cut a couple of branches.
- Besides branches, you will also need a couple of oranges.
- Glue gun
- String plus bow-shaped pasta
- Spray paint
How to make-:
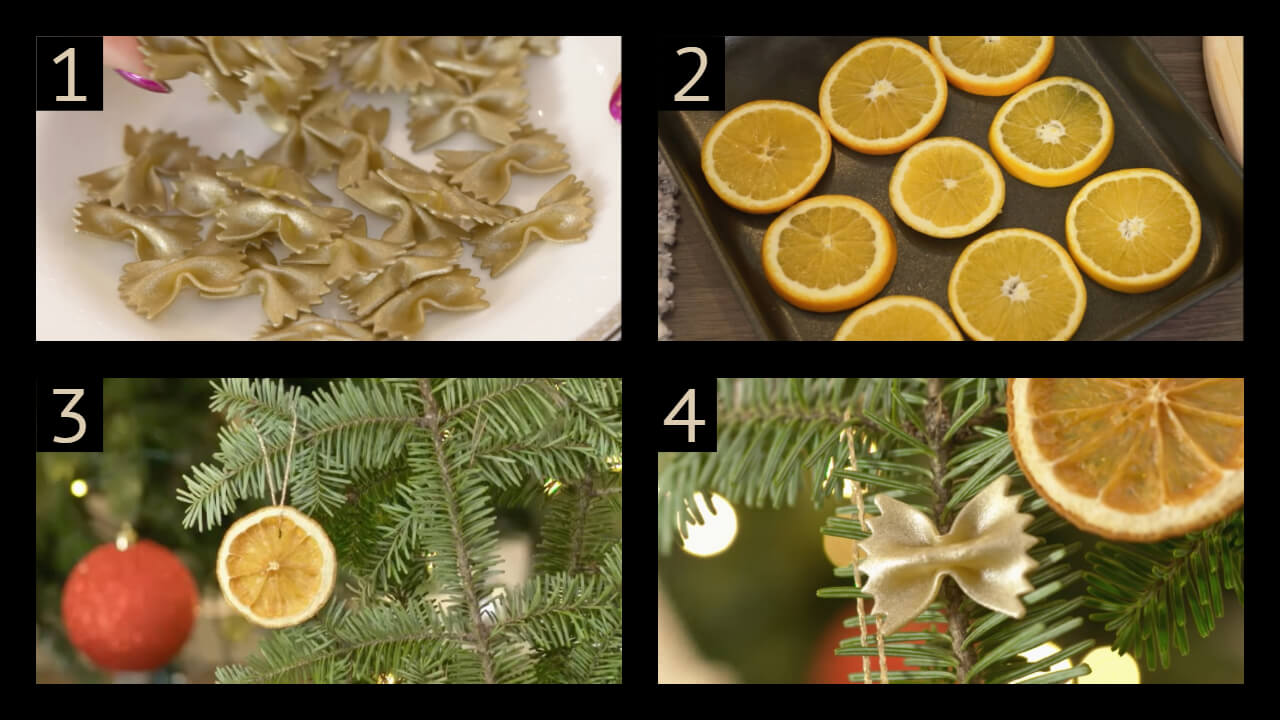
- First, we’re going to paint our pasta. Protect the working surface with a cardboard paper or a plastic bag, place on your pasta and spray it on both sides. In a minute you are left with beautiful golden bow ornaments.
- Now we need to make our orange ornaments as well. Cut a quarter of an inch wide slices of orange. Place the slices on a baking tray and bake at 240 Fahrenheit for 3 hours. Take them out of the oven and let’s work on the hangers. Make a hole using a needle and lead a string through it. I am using a golden string, which goes perfectly with our gold bow pasta. Make a knot and we are ready to hang our orange ornaments on the pine branches. You can also decorate your Christmas tree using these beautiful dried orange slices.
- To attach the pasta bows simply apply a bit of glue at the back of each bow and stick them on the branches.
4. Wall art
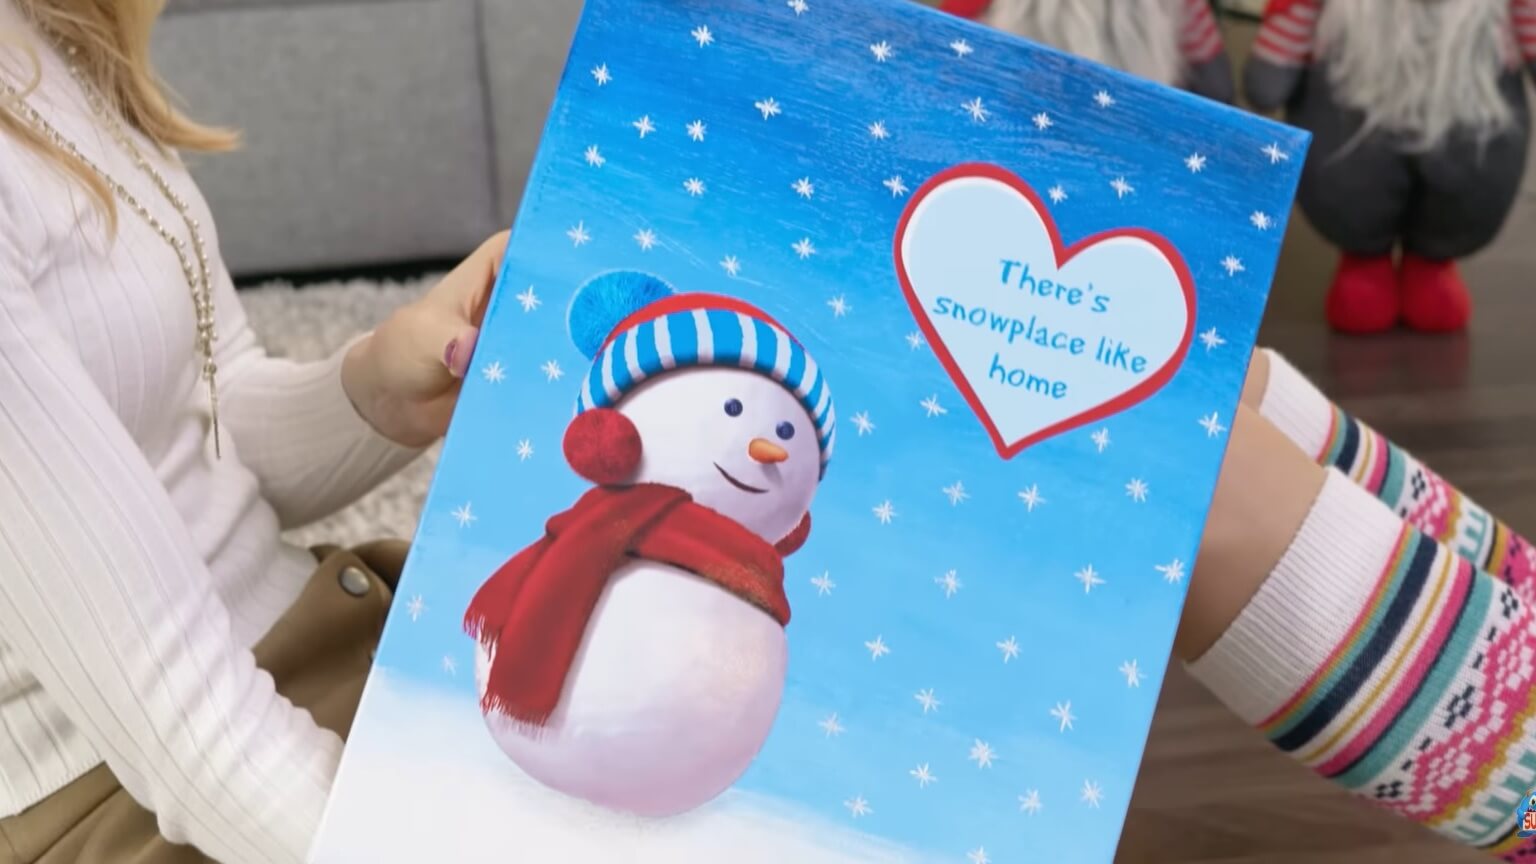
Time to make this gorgeous winter wall art, with snowman and a little quote. I do suggest using a photo paper when printing out your pictures instead of a regular paper. This canvas is a great winter decor for your room or the entrance of your house.
Requirements-:
- Canvas
- Palette
- Blue and white acrylic paint,
- Sponge applicator
- Water
How to make-:
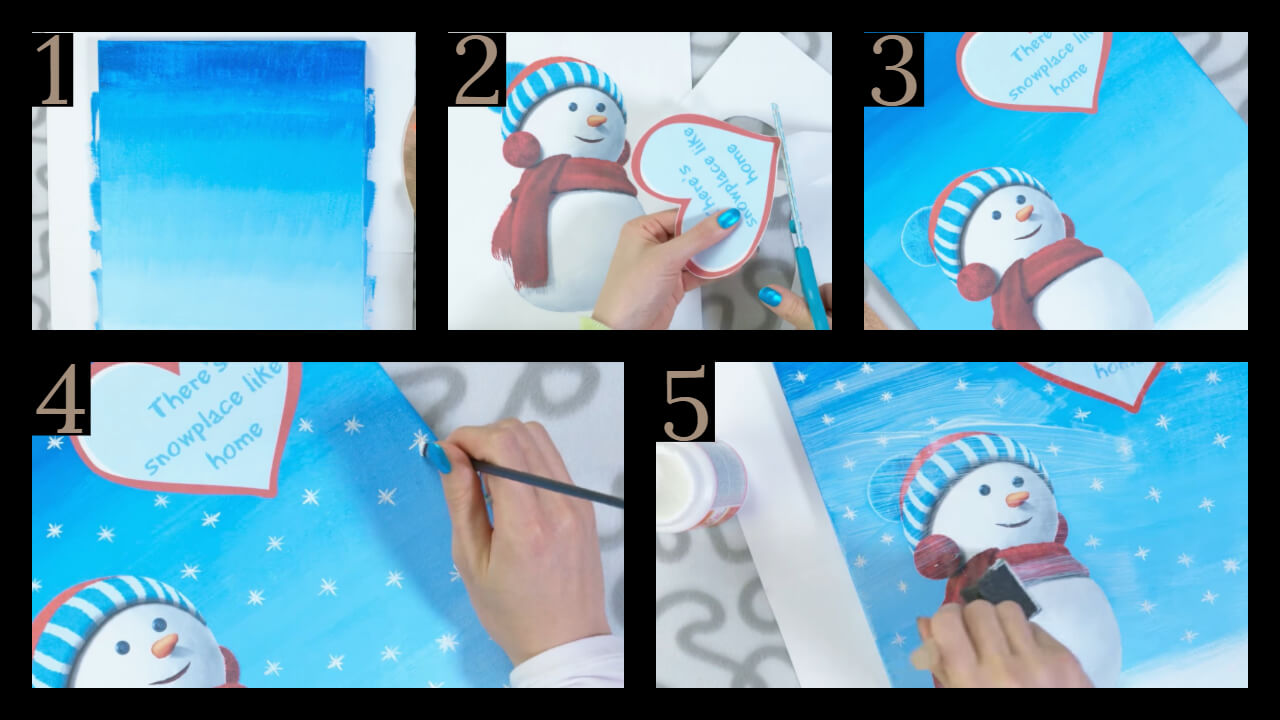
- Let’s make a blue gradient for the background. Squeeze some dark blue paint on a palette. Dip the sponge in the water and then into the paint. Color the upper edge of your canvas making a wide blue stripe.
- The background should be darkest on top and lightest on the bottom, so to get a slightly lighter blue shade, mix in a bit of white. Then color the section below the darkest blue with the lighter blue shade and blend the two colors together. For an even lighter blue color add more white acrylic paint and color the section below our previous color. Continue these steps by adding more and more white paint until your canvas is all covered in the pretty blue gradient.
- Color the bottom part using pure white paint to represent the snow on the ground.
- Now it’s time to print out our quote. Of course, we also need to print out a snowman. Apply some glue on the back of the snowman and the heart, and stick them on to the canvas. You can get a lot of snowman pictures on the internet. So just google it and you will find a lot of results. You can, of course, be creative and instead of the snowman you can print other pictures, like a house, a Christmas tree, anything you like.
- To make this wall art extra wintery draw a lot of white snowflakes all over the canvas using a small paintbrush.
- If you want an extra little detail you can add some silver glitter paint on top of each snowflake.
- You can also make a shade under the snowman using a pencil to make a picture more realistic.
- To bring together the canvas with the printed snowman and the heart cover the entire canvas with a very thin layer of mod podge.
5. Stocking
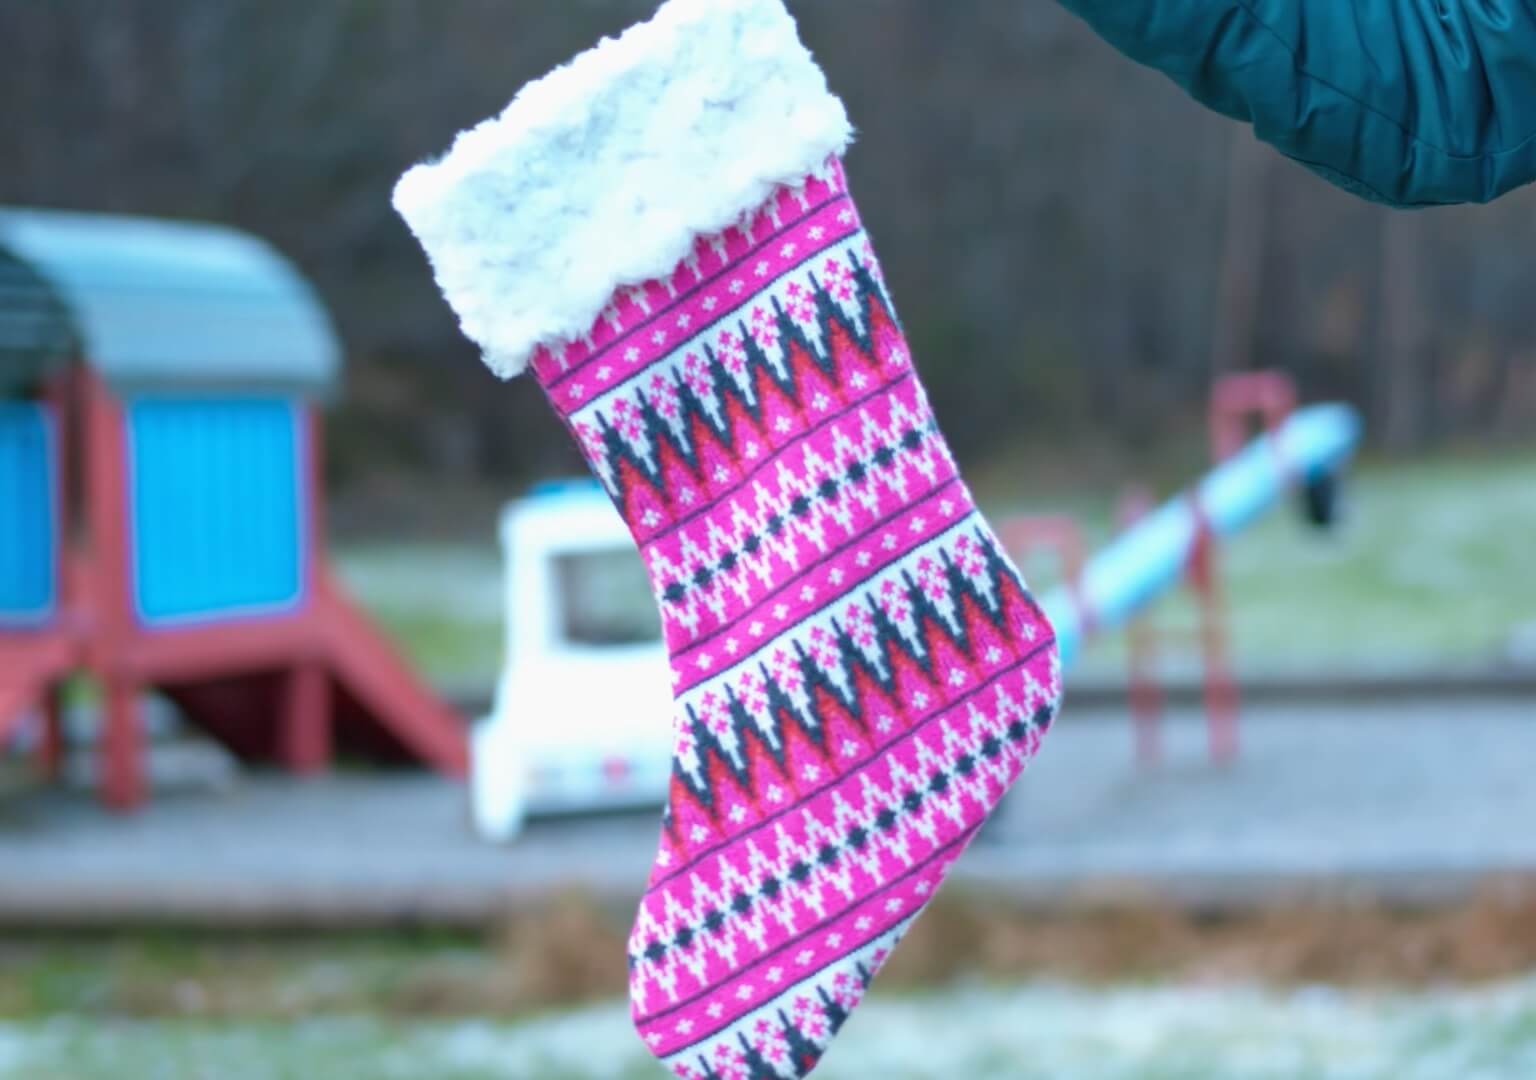
We are making a stocking! Because, where will Santa otherwise leave all our presents?
You can also use this as a gift wrapping idea and fill this stocking with little presents for a friend or boyfriend. Everyone would be so happy to receive such an awesome gift.
Requirements-:
- Fabric cloth of your choice,
- White furry material (optional)
- Stocking stencil
- Fabric glue
How to make-:

- First, we need to cut two stocking shapes from our fabric. You can just do it directly but I like to use a stencil to get a perfect shape.
- Place some tape pieces on the stencil and then stick it on your fabric.
- Cut it out using scissors or an Exacto knife.
- Take the other piece of fabric and now we have to cut out a mirror image of the first stocking shape. To do that we need to peel of the tape pieces on this side of the stocking, flip the stencil around and stick the tape pieces on that side. Cut out the stocking shape. If you want you can totally have the same fabric on both sides of your stocking.
- When both stocking sides are cut out it’s time to glue them together. Apply a stripe of fabric glue all around the edges of one stocking side.
- After about fifteen minutes the glue should be completely dry and you can flip your stocking inside out.
- Cut about ten-inch stripe from your fabric. We will use it as a hanger for the stocking. Glue the stripe ends together.
- Now let’s apply an awesome fur ending to the socking. Apply two parallel stripes of glue on the top edge of the stocking where you have the opening. Do this all around the stocking so that the entire top part is wrapped in the cozy fur.
- The only thing left to do is gluing the hanger on the back part of the stocking and we are done.
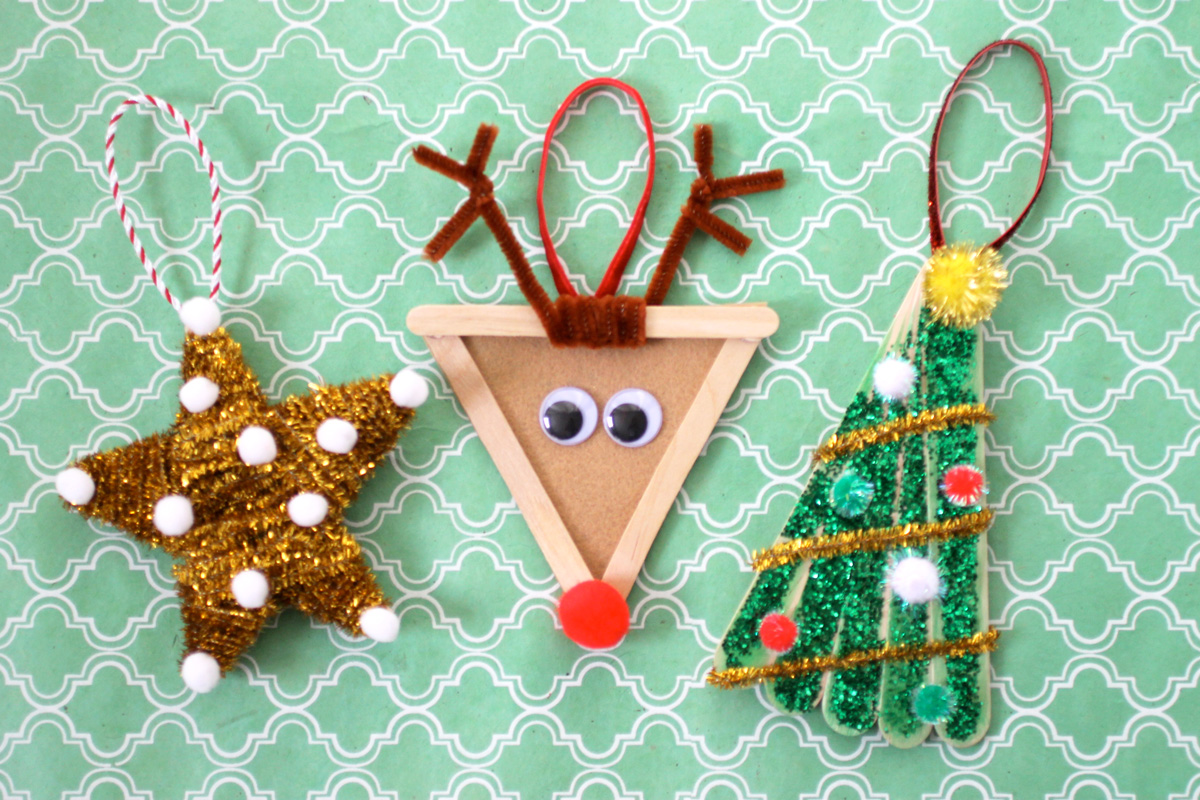
6. Clay stars
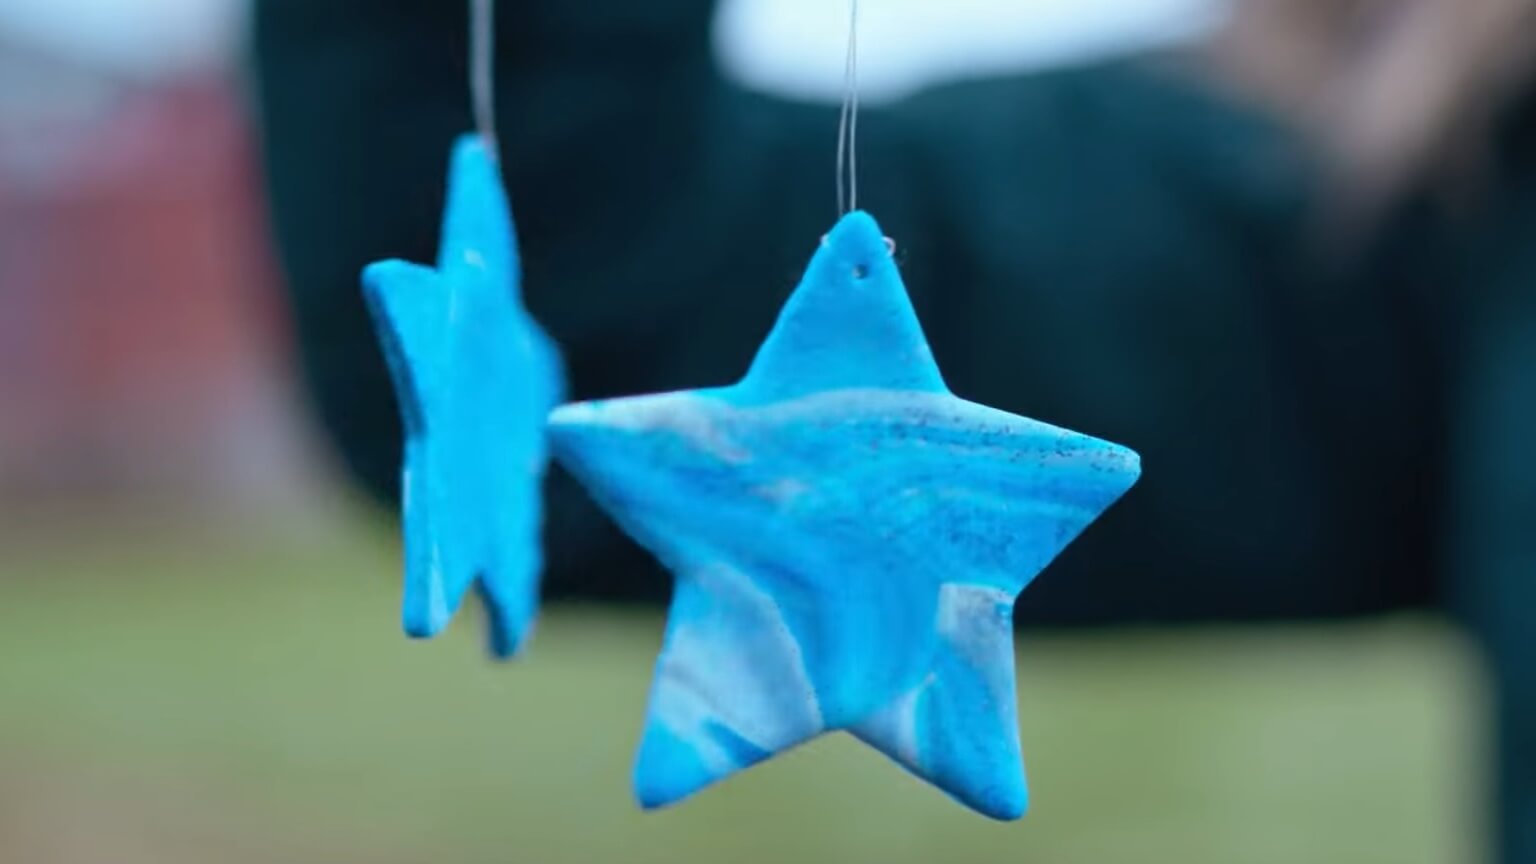
Clay stars are such an awesome and versatile decor idea that you can actually make all year around. Hang them on your window, wall or even use them to decorate your Christmas tree. I already plan to make these using bright clay colors for the spring and summer because this DIY is just so much fun.
Requirements-:
- Different colors of clay
- Star cookie cutter
- Dough roller
How to make-:
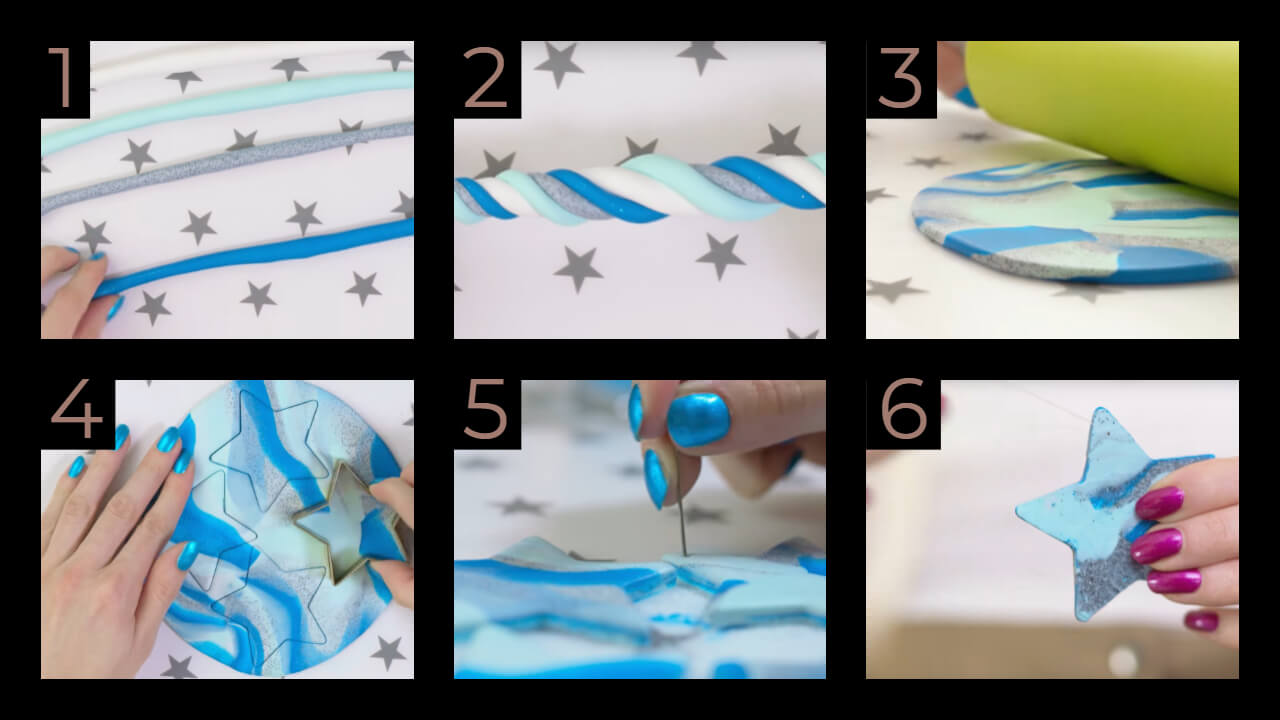
- Roll the colors of your choice into strips.
- Twist all the strips together and note that the more you twist, the more marbley your stars are going to be.
- Mix all the colors together
- Then form the clay into a little marble ball. Place it on the flat surface and use a roller or something rounded like a vase or a bottle to flatten it.
- Take a star-shaped cookie cutter and press it on the clay to get beautiful clay stars.
- To make these stars easy to hang once they harden, we also need to make a small hole using a needle.
- You can bake them and speed up the process.
- These beautiful stars are now all dry so use the hole we made earlier to tie on a piece of thread.
- We are finally ready to decorate the room with these beautiful marble stars.
7. Frozen candle
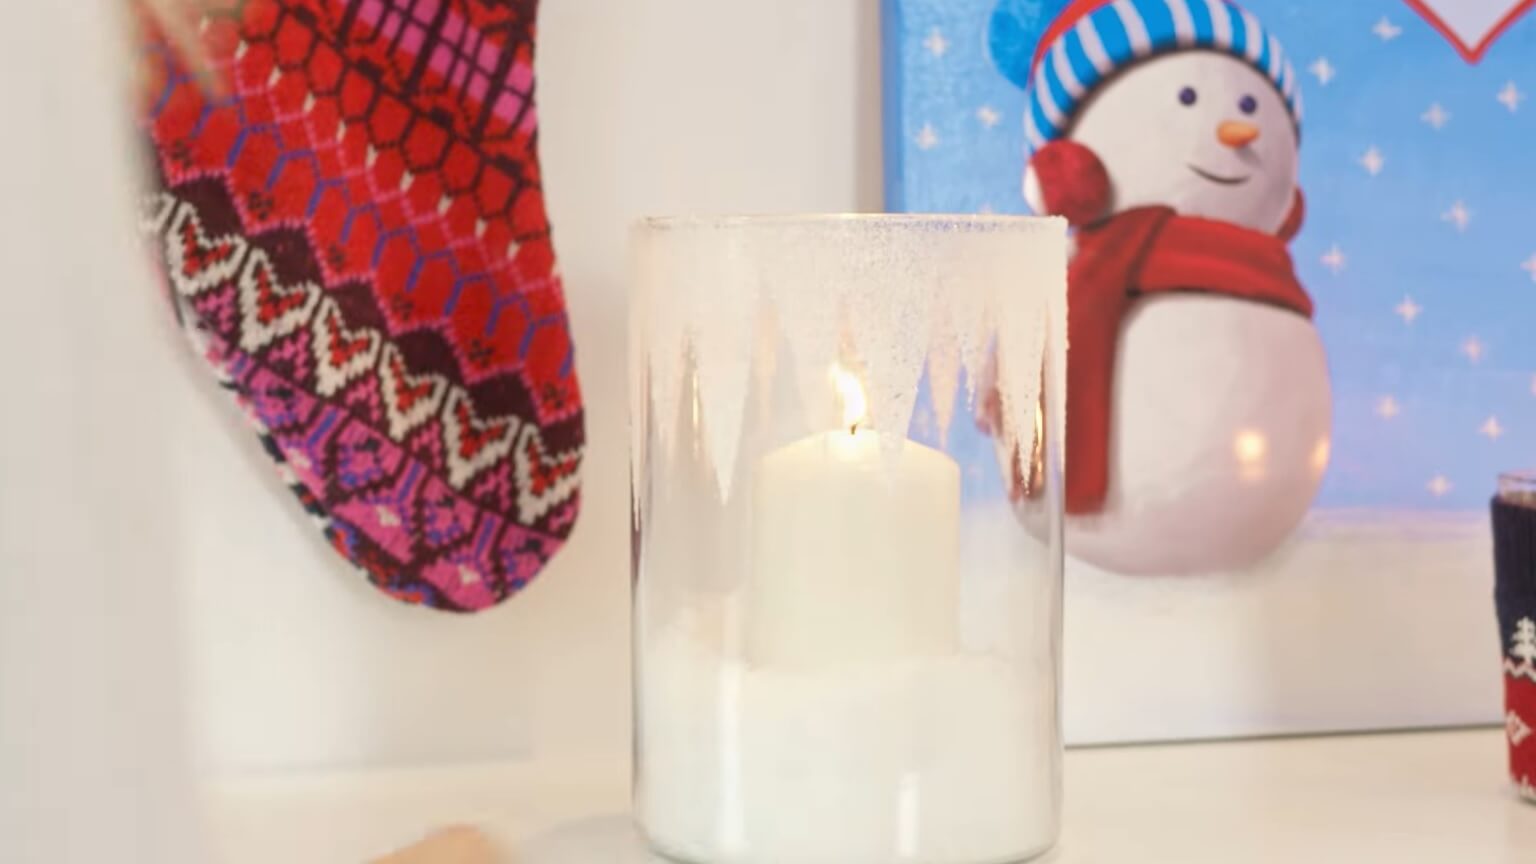
Want your room to look like a real winter wonderland? This frozen candle will help you get just that.
In the evenings I like to turn all the lights off and I light this candle – it seriously looks so gorgeous. This could also be a great gift for a friend, your mom or anyone that likes candles and pretty decorating pieces.
Requirements-:
- A vase
- Snow spray
- Artificial snow
- Candle
How to make-:
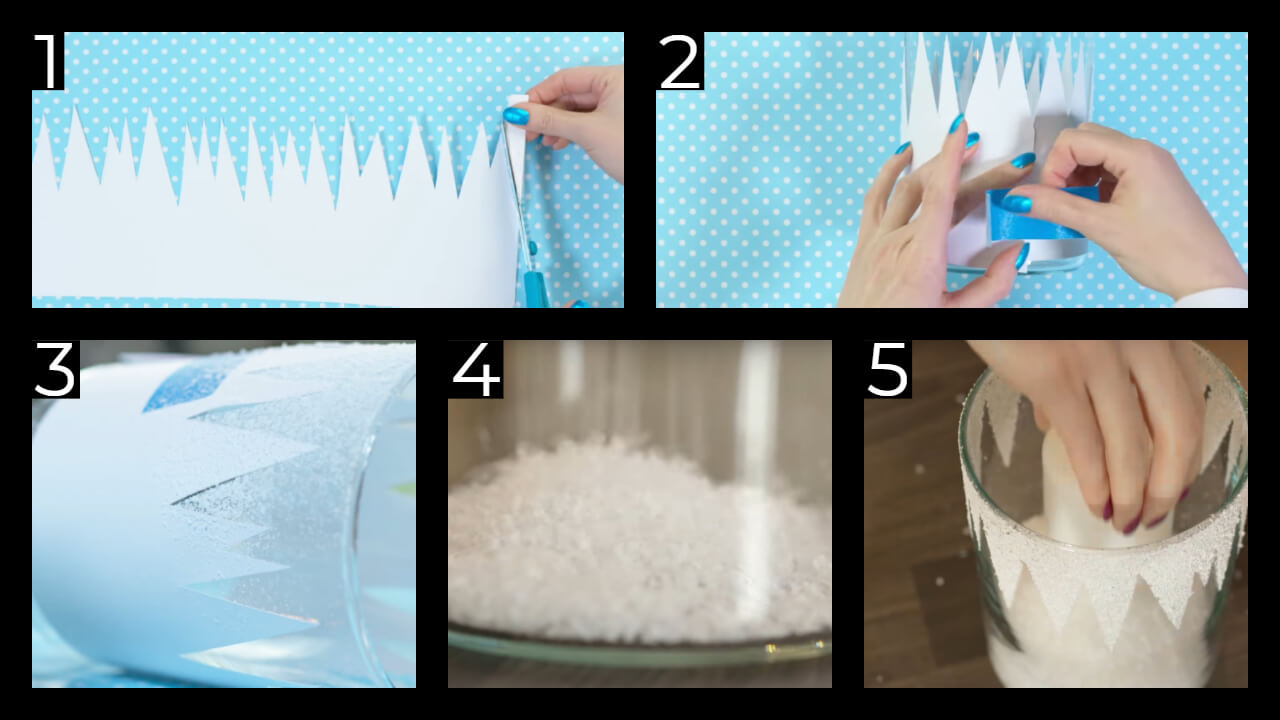
- Take a piece of paper and sketch a zig-zag line all along. We are creating a stencil that will help us make the perfect ice stalactites.
- Cut along the sketched line using your scissors. This shape really reminds me of the scary teeth of a shark or some other beast.
- Take your vase and wrap the stencil around it. As you can see the top of the vase stays uncovered and this is where we will apply the snow.
- Take your artificial snow and spray it all around the vase until the top edge is completely covered and you can’t see any transparent parts. I really love this spray as it makes everything look so wintery in a second.
- After a few minutes, the snow on our vase sets and we can remove the stencil.
- Now what’s left for us to do is to pour in some artificial snow and place a candle in the middle. This is such a fun DIY to make and I think it really turned out epic.
8. Mittens pillow
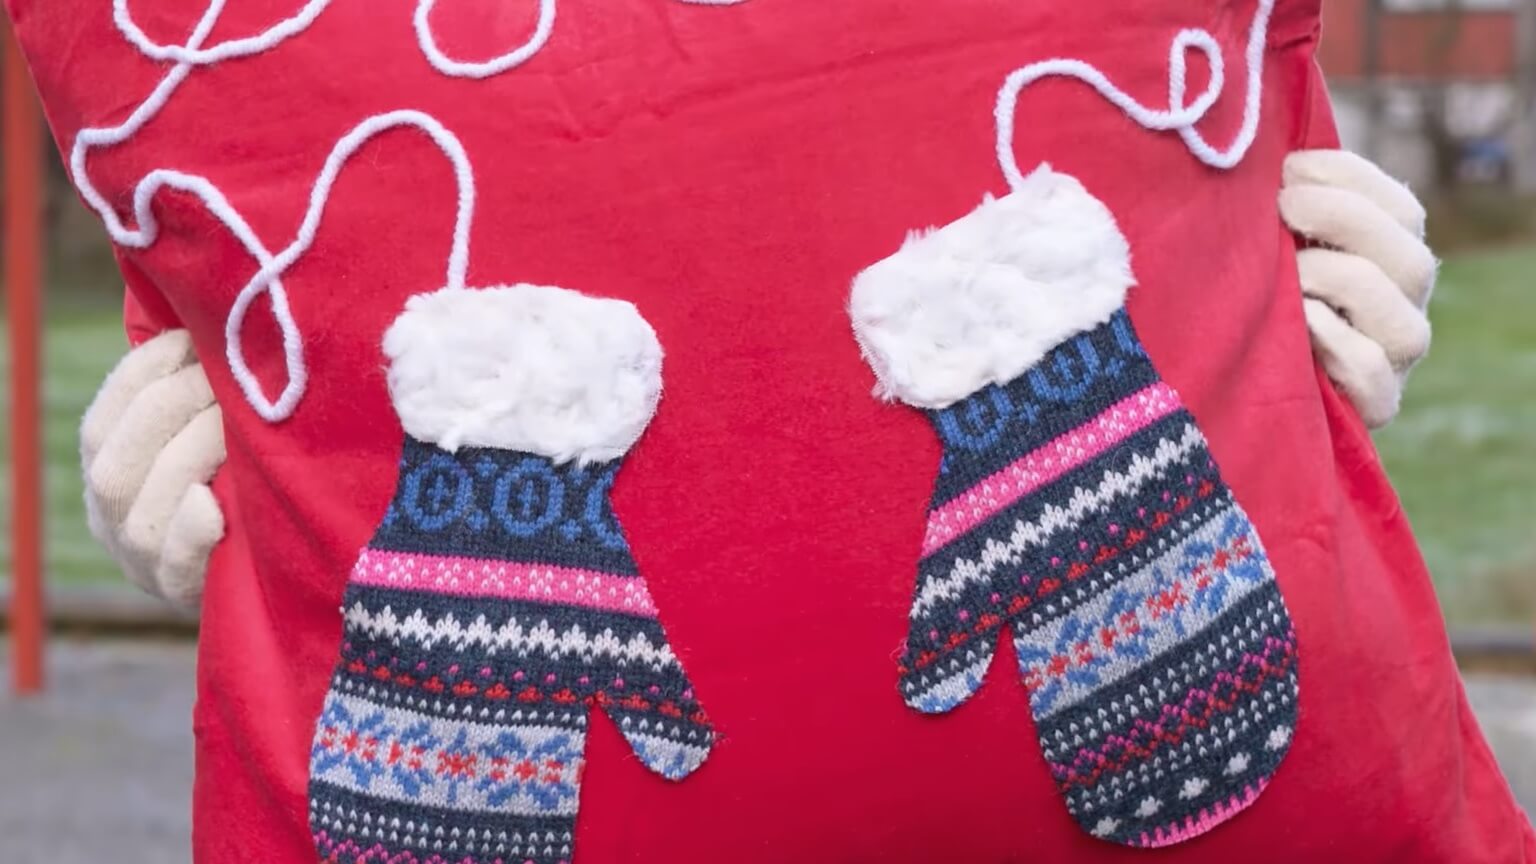
Now let’s make this beautiful mittens pillow, which is a perfect decorating piece for Christmas and winter.
This is a great decoration for your bed or a sofa. It just adds a warm and cozy feeling to any space.
Requirements-:
- Pillow case
- Patterned fabric
- Piece of white fabric
- Yarn
- Fabric glue
How to make-:
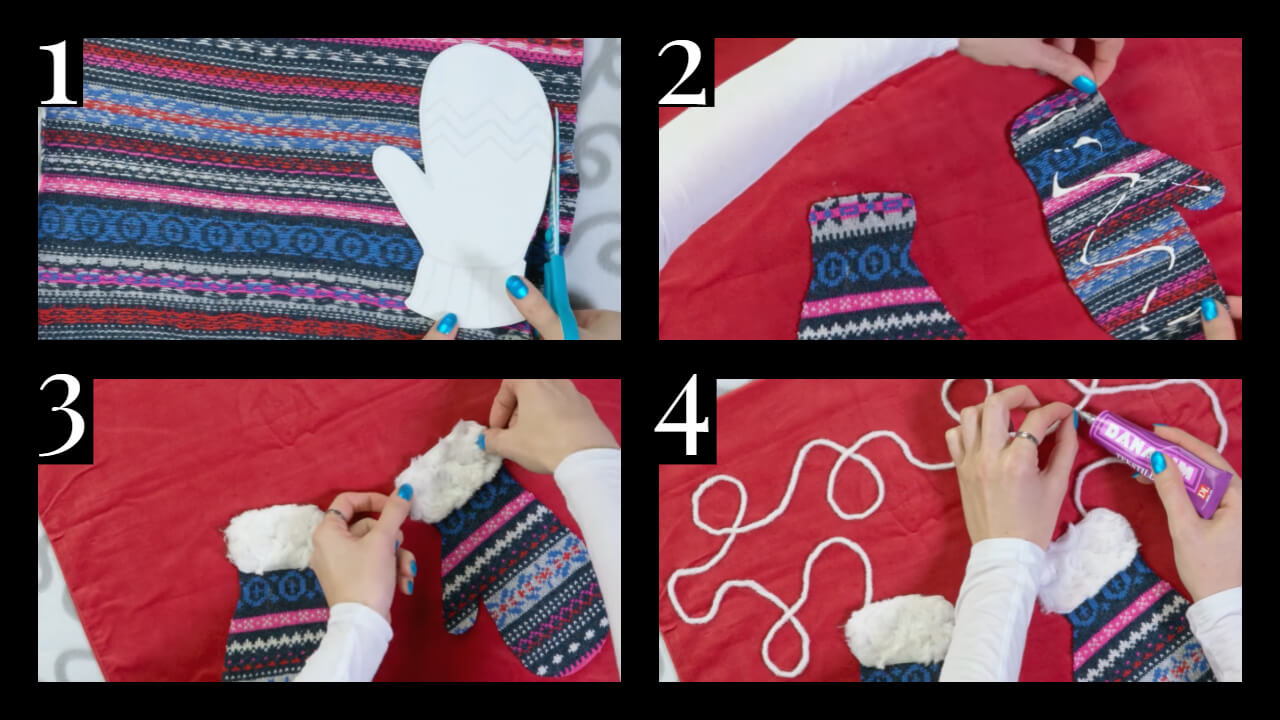
- First, we need to cut a mitten shape out of the fabric.
- Find a stencil of your choice on the internet. Print it and then cut it out with scissors.
- To keep the stencil in place while cutting the fabric, we need to stick some tape pieces on one side.
- Flip the fabric so that the wrong side is facing up and stick on the fabric. Now we can easily cut a perfect mitten shape and the stencil will stay in place all the way.
- Now we have to make a mitten for the right hand too. Remember that now you have to cut out a mirror image of the first one.
- Apply some fabric glue on the back of mittens, hot glue should work fine too, and stick them on the pillow.
- Fancy pillowcases can be very expensive, while you can get such plain cases for a few dollars. I chose the red one which makes it a bit more Christmassy but you can use white or blue one and your pillowcase will be perfect for all winter long.
- Next step is optional but I happened to have this white faux fur fabric so I decided to cut two little pieces and stick them on the wrist part of the mittens. Instead of such fur material, you can totally use white knit or cotton fabric. Now they look even more soft and cozy.
- To make our pillow even more interesting and full I am gluing a piece of white yarn, making sure that the ends are attached to the mittens. This string makes the pillow look so retro.